6/4/2019
After looking at some of the photos for the memory contest yesterday, it became clear that we are still struggling a bit with things like exposure and white balance. Today is the seniors' last chance to edit their portfolios in Lightroom. Please make sure all of your photos are properly exposed, white balanced and cropped to rule of thirds. These things will make a difference in your final grade!!!!
If you have not turned in your permission form for walking field trips, make sure you give it to the sub today. It is still supposed to be dry on Wednesday and Thursday, and we will walk to the park one of those two days! You can't go if your form isn't turned in--so GET IT IN!!
If you have not turned in your permission form for walking field trips, make sure you give it to the sub today. It is still supposed to be dry on Wednesday and Thursday, and we will walk to the park one of those two days! You can't go if your form isn't turned in--so GET IT IN!!
6/3/2019
Today, after looking at a lot of underexposed photos on the memory contest. we went out and took one picture of a person doing **something** that was properly exposed. We uploaded it and called it "action exposure."
5/31/2019
We had a contest today!! We went around the building and took pictures that illustrated the concept of reminiscence/memory. We uploaded our single best image as part of the contest.
5/23-30/2019
We had time to work on our portfolio project.
5/22/2019
Today, we are going to be introduced to our final project--the PHOTOGRAPHY PORTFOLIO
In this portfolio, you will select 10 IMAGES from this semester of photography class. These pictures should represent the ABSOLUTE BEST pictures you have taken this semester, and should include a variety of images (I don't want 5 images from your Everyday Object project, for example). You may choose to include "regular" pictures you took for the TV, AV and Everyday Object projects (and any other similar projects). You may also include photos that you have edited or enhanced, such as with the portrait editing project.
Once you have selected your images, you will create an electronic portfolio using Google Slides or another presentation software program of your choosing (PowerPoint, Adobe Spark, etc.). You will place ONE image per slide.The background for these slides should be solid black or solid white--your choice. You will caption this image with what techniques and/or composition elements the photo demonstrates. You also need a title slide with your name on it.
Then, you will present the portfolio to the class. You will show each of the pictures, and talk BRIEFLY about why you chose to include the picture.
For seniors, the portfolio will be due on Wednesday June 5. Seniors will make presentations at that point. For sophomores and juniors, the portfolio will be due and will be presented during our scheduled final day, which is likely June 12, but I will have to check. :)
EDITING EYES
So much of portrait editing has to do with enhancing the subject's eyes. The techniques below can help you do that. Enhancing eyes is often a matter of "Just because you can, doesn't mean you should." You want these enhancements to look NATURAL, not like photo editing.
https://x-equals.com/making-the-eyes-pop-in-lightroom-cc/ (I really like this one--very clear and step by step)
https://www.youtube.com/watch?v=hqXzQY7yFXg (If you prefer a video)
EDITING SKIN
Perfect for removing blemishes (don't remove moles or freckles, though), helping even skin tone, or softening wrinkles (not that you have them, but you can use these tips on portraits of family members, too. Don't do too much, or the skin will look plastic, which is creepy.
https://www.theluxelens.com/blogs/luxe-blog/how-to-use-lightroom-how-to-fix-wrinkles-pimples-and-smooth-the-skin-in-lightroom
WHITEN TEETH
https://www.youtube.com/watch?v=lBXmVPqNo7M
https://www.youtube.com/watch?v=6Dx33sReemM (This is a different way to adjust than the first video--the first part seems the same, but the adjustment technique is different)
HAIR
Smoothing, editing stray hairs
https://www.youtube.com/watch?v=PVwVjib6z-U
https://www.youtube.com/watch?v=1OCU-3XhlV4
5/6/2019
Today, we are starting a photo scavenger hunt. You and your partner will need to take pictures of all of the items on the list. You may not combine elements into one photo--each item on the list needs its own photo. These photos are going to be judged on composition and exposure rules, as well as on whether they contain the item from the list, so please take time to think about HOW you are shooting as well as WHAT you are shooting.
Each pair will submit 47 total photos. Each individual will then select four of these photos to edit in Lightroom and make a contact sheet.
You may take these photos in any PUBLIC area of the school. You may NOT enter classrooms. The libraray is off limits due to AP testing. You must be quiet and respectful in the hallways as to not disrupt testing.
My advice is to take multiple photos of each item, playing around with focus, angle and other composition elements so that you can get the best photos possible. Your task is to get each photo to tell a story. There should be a clear center of interest, and what item you are taking a picture of should be obvious.
Leading Lines
Framing
Shallow Depth of Field
Worm's Eye View
Bird's Eye View
Something noisy
Something quiet
Something to eat
Something big
Something small
Something teeny tiny
Something dirty
Something clean
Something shiny
Something glittery (not the same thing as shiny)
Something broken
Something with wheels
Something heavy
Something light
Something plastic
Something natural
A relaxing place
A peaceful place
An energetic place
The letter A
The letter S
The letter Z
Red
Blue
Green
Purple
Colorful
A backpack
A shoe
Water
Carpet
School Supply/Supplies
A book
The inside of something
The outside of something
The top of something
The bottom of something
Dreams
Work
Inspiration
Learning
Happy
Energy
4/25-26/2019
You are going to have some time to play around with various ways to do a PHOTO WITHIN A PHOTO over the next couple of days.
https://framedit.com/photo-within-a-photo/
One cool style of photo in a photo is to make a frame out of plain paper--you just cut out a rectangle of white or black paper. Then you can hold it in front of an object and "frame" it. Some examples of this effect are below.
https://mymodernmet.com/25-creative-examples-of/
A more advanced way to get the same effect is to hold up a blank white piece of paper in front of a background, then use Lightroom to place a second photo on top of the white paper, simuating a frame.
This video goes over how to layer photos on top of each other in Lightroom. https://www.youtube.com/watch?v=OMgY2C89yVA You should ignore the part about using the vignette and feather--you don't need or want them for your project. But the rest of it is pretty useful. This post https://lightroomkillertips.com/follow-insetting-one-photo-top-another-lightroom/ may also help provide some clarity.
You should be able to use your cell phone camera to make this work. Upload your images into the Google Drive app on your phone, and then download from Google Drive onto the desktop of your computer and then upload into Lightroom. Or use your phone cable to just download onto the desktop and then into Lightroom.
THEN, you are going to watch this tutorial to learn how to combine multiple images into one JPEG file for social media or printing. This is different from the contact sheets we have been making because there are no margins between the photos.
https://www.youtube.com/watch?v=IkkXuDLp8-g
Pick at least three images you've already taken for this project. It would be super awesome if those photos were related to one another in some way--similar subjects, similar topic, similar theme.
What I want from you on Monday: Two different examples of photo-within-a photo. One of these shoud be the ever popular "inception selfie" where its a picture of you holding your phone with a picture of you holding your phone and so on and so on. (You'll need to follow the steps of how to layer photos on top of each other in Lightroom to make this work. The other should be like one of the "creative examples" using a frame. I also want one example of three images that you have merged together into one jpeg.
This may be rather challenging. Help each other out, and I am sure you will be able to figure it out. See you Monday!
APRIL UPDATE...
We did some playing around with light, trying to use eternal light sources to provide fill light on faces when there is strong backlight.
We had some work days while Mrs. Holihan managed the yearbook deadline.
We had some work days while Mrs. Holihan managed the yearbook deadline.
4/4/2019
Today, we are going to play around in Lightroom even more. Below are five different tutorials for different effects in Lightroom.
Antique Effect: http://www.infoparrot.com/how-to-make-wonderful-antique-effects-using-adobe-lightroom/
Vintage Effect: http://www.designpanoply.com/blog/how-to-create-a-vintage-photo-effect-in-lightroom?a=8580
Lomo Effect: http://photographypla.net/create-lomo-effect-lightroom/
Black and White Conversions: http://www.presetkingdom.com/black-white-conversions-in-lightroom/
Grainy Matte Effect: http://photographypla.net/create-a-grainy-matte-effect-in-lightroom/
Pick one image, and follow the steps for Black and White conversions. (Yes, you can do this much more simply, but you really can't control how the final product looks). Play around with the sliders, until you are satisfied with the final product. Save this image with a unique name.
Pick three of the other effects, and adjust three different photos (one photo per effect). Save each edited photo with a unique name.
Make one contact sheet. It should contain all of the original images with all of the edited images next to them. :)
4/3/2019
Today, you are going to play around in Lightroom to make a Spotify Duotone effect. There are a number of methods for achieving this effect. Today, we're going to do THREE of them. Yes, really!
First, pick a picture you have already taken for this class. This picture should be of a PERSON or ANIMAL. (If you don't have one of a person, that's okay. But it is much cooler with a person.)
Then, watch this video. https://www.youtube.com/watch?v=WBHhAGBDbL0.
Make a red/blue "Spotify Duotone" version of your picture using the "Split Tone" method. Save this image with a unique name like "split tone"
Then, make one using the "Tone Curve" method. Save this one with a unique name like "tone curve"
Once you have made blue and red duotones, experiment with making other color combinations. Try purple and yellow, green and blue, aqua and red, nany and turquoise, hot pink and yello, or other color combinations. A general rule is that one of the colors should be quite dark, and the other quite light. Other than that, it's really only up to your creativity. As you experiment, you may find that some color combinations you though would work are absolutely awful, and others that you didn't think would work are quite pleasing.
Make at least four other Spotify duotones, using either the split tone or tone curve method. You will need to save each of these with a unique name so you can get them on the contact sheet.
Save all seven images on a contact sheet and save in your Photo I folder in the COLOR EDITING folder.
I also want you to type up a short reflection about these two different methods. Open a Google Doc and answer the questions below. Save this doc in your COLOR EDITING folder when you are done.
- Which of the two methods did you gave the best results in terms of color quality and the ability to get the colors you wanted?
- Why?
- Which of the two methods did you think was the easiest to use?
- Why?
- Which method would you use if you wanted to make a Spotify Duotone in the future?
- Why?
4/1/2019
PHOTO I:
Today, you are going to learn another fun photo-editing effect. This effect is known as the Pleasantville Effect or the Sin City Effect, due to two movies that were mostly shot in black-and white, but contain pops of color.
Basically, you're going to learn how to make a photo black and white, with one full-color element.
Here are two good videos to show you how to make this effect work: https://www.youtube.com/watch?v=EDUN_pUiZkQ and https://www.youtube.com/watch?v=CJuqR3
Watch them as many times as you need to.
Then, pick any one of the pictures you've already taken for this class, and follow the steps of the process to give it the Pleasantville Effect. Make a contact sheet that contains the original image and the edited image. Save this contact sheet in your Photo I folder in Google Drive. Make sure it's in the same folder we made on Friday--the one called COLOR EDITING.
PLEASE MAKE SURE THE HEADPHONES ARE HUNG UP ON THE SIDE OF THE MONITOR WHEN YOU ARE DONE. Thanks!
PHOTO II and III:
Today, you are going to simulate HDR photos!
Watch this groovy tutorial : https://www.youtube.com/watch?v=d9508sHP2Gc It explains what HDR is, and how to simulate it in Lightroom. I am pretty sure this will still work in the most recent version of Lightroom.
Here's another tutorial to help you: https://www.youtube.com/watch?v=7x_hJF6YJdg
To do this project successfully, you need to pick a subject that has a wide range of dark to light. It should have something VERY dark and something VERY bright.
You will need to take four different images of your subject. You need one to be really underexposed, one to be really overexposed, and two to be in the middle (but still different from one another). There are a variety of ways to do this--exposure bracketing, changing shutter speed or f/stop, changing ISO.
For your project, you are going to make FIVE different HDR pictures. Try to get one of some sort of nature, one of a person, and three of your choice.
For each of these HDR photos, do the following:
PLEASE MAKE SURE THE HEADPHONES ARE HUNG UP ON THE SIDE OF THE MONITOR WHEN YOU ARE DONE. Thanks!
Today, you are going to learn another fun photo-editing effect. This effect is known as the Pleasantville Effect or the Sin City Effect, due to two movies that were mostly shot in black-and white, but contain pops of color.
Basically, you're going to learn how to make a photo black and white, with one full-color element.
Here are two good videos to show you how to make this effect work: https://www.youtube.com/watch?v=EDUN_pUiZkQ and https://www.youtube.com/watch?v=CJuqR3
Watch them as many times as you need to.
Then, pick any one of the pictures you've already taken for this class, and follow the steps of the process to give it the Pleasantville Effect. Make a contact sheet that contains the original image and the edited image. Save this contact sheet in your Photo I folder in Google Drive. Make sure it's in the same folder we made on Friday--the one called COLOR EDITING.
PLEASE MAKE SURE THE HEADPHONES ARE HUNG UP ON THE SIDE OF THE MONITOR WHEN YOU ARE DONE. Thanks!
PHOTO II and III:
Today, you are going to simulate HDR photos!
Watch this groovy tutorial : https://www.youtube.com/watch?v=d9508sHP2Gc It explains what HDR is, and how to simulate it in Lightroom. I am pretty sure this will still work in the most recent version of Lightroom.
Here's another tutorial to help you: https://www.youtube.com/watch?v=7x_hJF6YJdg
To do this project successfully, you need to pick a subject that has a wide range of dark to light. It should have something VERY dark and something VERY bright.
You will need to take four different images of your subject. You need one to be really underexposed, one to be really overexposed, and two to be in the middle (but still different from one another). There are a variety of ways to do this--exposure bracketing, changing shutter speed or f/stop, changing ISO.
For your project, you are going to make FIVE different HDR pictures. Try to get one of some sort of nature, one of a person, and three of your choice.
For each of these HDR photos, do the following:
- Edit the final image so it is AMAZING. You need them to be merged together before you merge them.
- Make sure you make a contact sheet with the original images and the final merged file for each HDR image. :) Put all of these contact sheets into a "HDR PROJECT" folder in your Photo II/III folder.
PLEASE MAKE SURE THE HEADPHONES ARE HUNG UP ON THE SIDE OF THE MONITOR WHEN YOU ARE DONE. Thanks!
3/29/2019
Today, you're really going to edit the color of an image.
Make a contact sheet with the original image and the edited image. Make a contact sheet with both images.
Put them in a folder called COLOR EDITING in your Photo I folder.
Make a contact sheet with the original image and the edited image. Make a contact sheet with both images.
Put them in a folder called COLOR EDITING in your Photo I folder.
3/28/2019
Today, we're going to do some room in Lightroom and learn how CHANGE THE COLOR OF AN OBJECT! Sweet, right???
First, select two of the photos you have already taken for this class, and open them in Lightroom.
Then, watch this video: https://www.youtube.com/watch?v=0lCPsiCxShU It will explain how to change the color of an object in a photo using Lightroom.
Pick one of the two photos, start to follow the steps outlined in the video. While the guy in the video says he is doing a "quick job," I expect you to do a careful and through job "painting" the object you want to change the color of. Really take your time, and make sure every part of the object that you want to change the color of is "painted" and that nothing you don't want to change the color of is. Then, change the color of the object. Make the new color something completely different and unexpected! Refine your color until you get it exactly the way you want it, and then save the edited image.
Do this with the other image as well. Same thing--do a nice careful job "painitng" the image, then pick a new and different color.
3/27/2019
I'm super excited for our next project! I'm calling it EVERYDAY OBJECT.
Your task for this project is to take FIFTEEN different pictures of an everyday object. This object should be relatively small. It should also be something familiar. We're talking a pen, a mug, a cell phone, makeup, a shoe, your binder, a book, your backpack. Honestly, you can pick almost anything, as long as it is relatively small and school appropriate.
You must use the same object for all of the photos.
For this project, you are going to take 15 photos. Each of these 15 photos needs to be fundamentally different from all the others. This means that while the photos are of the same overall object, each photo needs to be different from all the others. To accomplish this task, you can:
Please note: For this project, it is not necessary--or recommended--to move the object. This isn't about having a bunch of different backgrounds. It's about using the camera to take different images that focus on the object--or a portion of the object--itself.
In some ways, this project is similar to your "all about me" project from the beginning of the semester. Except, instead of being all about YOU, this project is all about THE OBJECT you choose. Now that you are familiar with TV and AV modes, and understand exposure, and know a variety of composition techniques, this is a chance to showcase your abilities!
And, as always, your finished images should be cropped and adjusted (just for exposure and color balance, really) in Lightroom.
You will take pictures today. You should be talking at least twice as many photos as you think you need, so you can pick the best ones. Then, you will upload. Tomorrow and Friday, you will make a contact sheet with your 15 selected photos. Then, Monday, we will learn how to take these images and make a Photo Essay. :)
Your task for this project is to take FIFTEEN different pictures of an everyday object. This object should be relatively small. It should also be something familiar. We're talking a pen, a mug, a cell phone, makeup, a shoe, your binder, a book, your backpack. Honestly, you can pick almost anything, as long as it is relatively small and school appropriate.
You must use the same object for all of the photos.
For this project, you are going to take 15 photos. Each of these 15 photos needs to be fundamentally different from all the others. This means that while the photos are of the same overall object, each photo needs to be different from all the others. To accomplish this task, you can:
- Photograph different portions of the object
- Use depth of field and selective focus to highlight different portions of the object
- Use different composition techniques (angle up, angle down, framing, etc)
- Use a different focal length (extreme close-up to the entire object)
Please note: For this project, it is not necessary--or recommended--to move the object. This isn't about having a bunch of different backgrounds. It's about using the camera to take different images that focus on the object--or a portion of the object--itself.
In some ways, this project is similar to your "all about me" project from the beginning of the semester. Except, instead of being all about YOU, this project is all about THE OBJECT you choose. Now that you are familiar with TV and AV modes, and understand exposure, and know a variety of composition techniques, this is a chance to showcase your abilities!
And, as always, your finished images should be cropped and adjusted (just for exposure and color balance, really) in Lightroom.
You will take pictures today. You should be talking at least twice as many photos as you think you need, so you can pick the best ones. Then, you will upload. Tomorrow and Friday, you will make a contact sheet with your 15 selected photos. Then, Monday, we will learn how to take these images and make a Photo Essay. :)
3/25/2019
Today, we are going to practice some selective focusing. We will pick an object and practice getting closeups of different parts of the object. This can be a challenge with our
Photo II and III: NEW PROJECT: COLOR
For this project, you are going to submit 40 photos where you focus on COLOR. This is deliberately vague, but basically, I want you to work on capturing images that somehow use color to make a meaningful photo. You can simply look for images that contain complementary, monochromatic or analogous color. Or you could make things more abstract, and base your based on color psychology https://en.wikipedia.org/wiki/Color_psychology and choose red images that show power or green images that show envy. Or, you could also just be based on concepts or ideas that relate to a color (like water with blue or plants/growth with green). It is really up to you how you choose to execute this project.
Your photos should each contain deliberate use of one of the following. You may vary the color modes for each photo. :)
You will submit 40 total photos into your Photo II or Photo III folder. Then you will pick your best 4 and put them on a contact sheet.
Photo II and III: NEW PROJECT: COLOR
For this project, you are going to submit 40 photos where you focus on COLOR. This is deliberately vague, but basically, I want you to work on capturing images that somehow use color to make a meaningful photo. You can simply look for images that contain complementary, monochromatic or analogous color. Or you could make things more abstract, and base your based on color psychology https://en.wikipedia.org/wiki/Color_psychology and choose red images that show power or green images that show envy. Or, you could also just be based on concepts or ideas that relate to a color (like water with blue or plants/growth with green). It is really up to you how you choose to execute this project.
Your photos should each contain deliberate use of one of the following. You may vary the color modes for each photo. :)
- complementary colors
- monochromatic color (not just black and white, but shades of the same color)
- Analogous color
You will submit 40 total photos into your Photo II or Photo III folder. Then you will pick your best 4 and put them on a contact sheet.
3/18/2019
Today, you are going to play around with Camera Sim. It's another cool online camera simulator.
For ALL of the exercises you are going to do, mmake sure your FOCAL LENGTH is set for 50mm. The lenses we have on the class cameras are 50mm prime lenses, so I want you to practice with what we have. You only get to take 15 total "photos" on Camera Sim, so this is definitely a challenge to see if you can accomplish the tasks with only your 15 photos!! (If you need more than 15 photos, just open an incognito window and try again!)
When you get a properly exposed photo, write down the F stop, shutter speed and ISO (it will tell you this underneath the photo) on a sheet of paper.
Photo 1: 50mm, f/22, 1/400 sec, ISO 1600
AV MODE--Please set Camera Sim to Aperature Priority Mode.
Photo 1: Please set lighting to "Sunny" and take a picture where the motion of the pinwheel is stopped and the depth of field is deep (the entire background is in focus). You may need to adjust the ISO. When you get a properly exposed photo, write down the F stop, shutter speed and ISO (it will tel you this underneath the photo).
Photo 2: Please set the lighting to "Partly Cloudy" and take a picture where the motion of the pinwheel is stopped and the depth of field is shallow (the background is blurry).
Photo 3: Set the Lighting for "Bright Indoor" and take a properly exposed photo where the depth of field is deep (the background is in focus). Hint: The pinwheel will be blurry.
Photo 4: Set the Lighting for "Dim Indoor" and take a properly exposed photo where the depth of field is shallow (the background is blurry). Hint: you may want to click the tripod button for this one. :)
TV MODE--Please Set Camera Sim to Shutter Priority Mode
Photo 5: Please set lighting to "Sunny" and take a picture where the motion of the pinwheel is stopped.
Photo 6: Please set lighting to "Overcast" and take a properly exposed photo where the girl is in focus, but the pinwheel is blurry
Then, answer these questions:
7. If you want to take a portrait, should you use AV or TV mode? Why?
8. If you're shooting a gymnastics meet, should you use AV or TV mode? Why?
9. If you want to ensure the background of your photo is blurry, should you use AV or TV mode? Why?
10. If you're shooting landscapes and want everything to be in focus, should you use AV or TV mode? Why?
11. if you are taking pictures in a darkened room, should you use AV or TV mode? Why?
12. If you are taking pictures at night, should you use AV or TV mode? Why?
3/14/2019
HAPPY PI DAY!!!
Today, we made sure that all of our pictures from yesterday were in our Photo I folders in a folder called TV Project.
We looked at the photography rubric below. Then, we picked our 4 best photos from the pictures we took yesterday and opened them up in Lightroom. We cropped and edited the photos so that they are well exposed, fit the rule of thirds and are well color balanced.
Then, put the four images on a contact sheet. Make sure the caption includes the exposure information. :) Save this contact sheet in your TV Project folder in your Photo I folder.
| photography_rubric.docx |
3/13/2019
Today we talked about shutter speed, and the TV Mode on our cameras.
Then we went out and took pictures at different shutter speeds, experimenting with blur and stopped motion.
Each of you needed to take 25 photos. I suggested taking 3-4 photos of the same thing at different shutter speeds.
Then we came back to class, and you uploaded the images into Google Drive and Lightroom. You can call the folder in Google Drive "TV Project."
We will do some editing with these photos tomorrow!
3/11/2019
I was gone. You watched a couple of episodes of "Tales of Light" on Netflix. I cannot say enough good things about this show. I love listening to the photographers talk about their process and some of the technical stuff. Plus, the cinematography is AWESOME!
3/8/2019
PHOTO I FOLKS: Today we had work time to make sure that all of our assignments are in our Photo I folder. You should have uploaded the Exposure contact sheet you made Wednesday or yesterday in there, as well as the photos you edited in Lightroom that we started working on before the Snowmageddon.
If you have a 0 for any assignment, it's because I couldn't find the pictures or contact sheet in your Photo I folder. It is possible that you are saving these in the "PHOTO" folde rinstead of the "PHOTO 1" folder in your Google Drive. Please double check that EVERYTHING for this class is in the PHOTO I folder, as that is the only folder I have access to. I can't grade what I can't see. :)
PHOTO II/III FOLKS: Time for a new project. We're going to call this one the Adjective Project. Below is a list of 25 adjectives. You're going to pick 4 of these adjectives. You honestly can pick any four--whatever ones speak to you are fine. For each adjective, please shoot 10-15 different photos. These photos should illustrate the adjective. They can be literal, but the best pictures are going to capture the "essence" of the adjective in a symbolic or metaphorical manner. (For example, "old" could be a portrait of an elderly person, but it could also be a picture of an antique record player, or an old magazine, or something like that.)
You will submit a total of 50 photos (10-15 of each adjective). Put these photos in a folder in your Photo II or Photo III folder called Adjective Project. Then, you will pick your best four photos and put them onto a contact sheet in Lightroom. Upload this contact sheet into the Adjective Project folder. You will get completion points for your 50 photos. The best 4 photos will be evaluated on quality, using the rubric attached below.
Happy
Sad
Angry
Joyful
Full
Empty
Dark
Light
Fast
Slow
Calm
Energetic
Tired
Focused
Big
Little
Serious
Playful
OId
Young
New
Mysterious
Clean
Dedicated
Proud
3/7/2019
Today, we are going to talk about the other two sides of the exposure triangle: shutter speed and ISO.
ISO used to be known as film speed, but hey, we don't use film anymore. We still use the term ISO to talk about "sensitivity to light" even though that's not really how a digital camera works. The ISO settings allow you to compensate for the ambient light and get a properly-exposed photo. If you are in direct, bright sunlight, you would select an ISO of 100. If you're shooting in a very dark room, you may need to adjust the ISO to 3200 to get a properly exposed photo. The problem with changing the ISO is that, as the number increases, so does the "grain" or "noise" of the image--at 3200, an image may look like it's spotted or sort of pixelated. It's a tradeoff--you have to balance the need to expose the photo properly with the additional grain.
I think of ISO like this--if you've set the shutter speed and aperture properly for the photo you want to take, and the image is still to dark or too bright--you need to adjust the ISO to adjust the "brightness" of the photo.
Shutter speed is like opening a door--the longer the door is open, the more light is let in. Also, the more motion the sensor captures. So, if you want to stop motion, you need to have a fast shutter speed.
Shooting in TV mode allows you to set the shutter speed, and the camera will adjust the aperture and ISO as necessary to get a properly exposed photo. Very useful for situations when your priority is stopping the motion--like shooting sports or other action photos (and the opposite, if you are deliberately trying to blur motion).
Here a couple of articles that break down these concepts in a pretty clear manner:
Shutter speed, explained
What ant to know more about ISO? Read this to find out
Canon, the manufacturer of our cameras, has a cool interactive simulator on their website. Start here, and click on the "learn" tab to review the concepts of exposure and shutter speed. Then, when you're done reviewing that section, click on the "Play" tab. This will take you to a cool simulator, where you can "take pictures" in AV and TV modes, as well as full manual mode.
http://www.canonoutsideofauto.ca/challenge/
3/6/2019
Today, we learned about AV mode on our cameras. This "semi-automatic" mode is aperature priority. It allows you to set the aperature, and then automatically adjusts other elements like shutter speed and ISO to produce a properly-exposed image with the aperture setting you desire. This mode is awesome when you want to control the depth of field of an image!
We read this article, https://www.slrphotographyguide.com/av-mode/ then went out and shot some photos based on the assignment at the end of the article.
After reading the article, we went out to the gazebo area and took some pictures in AV mode. You each took four photos, one at f/1.8, one at f/7.1, one at f/11 and one at f/22.
The purpose of taking these four photos at these f stops was to see the difference in the depth of field--how the background is very blurred at f/1.8 and in sharp focus in the f/22 image.
Understanding the relationship between aperture and depth of field is very important to taking successful pictures--you want to be able to control the depth of field, which means you need to be able to control the aperture!
THEN, ONCE WE GOT BACK, we are going to learn to make a contact sheet in Lightroom.
A contact sheet is basically a single document with multiple images on it.
Please follow these step-by-step instructions.
For this assignment, select the 5 x 11 LANDSCAPE template.
When you go to add the photos, please add them in order of exposure compensation. Do this in Library. You should start on the left with your f/1.8, f/7.1, f/11 and F/22 in order. If you have done this correctly, the image with the blurriest background should be on the left and the image with the most focused background should be on the right.
I want you to add captions to these photos. Following the directions, use the Photo Info menu in the Page section to add the caption. Click "edit" at the bottom of the window that pops up. Then, look for EXIF Data in the window that pops up. Select Exposure. Chlick "insert". Then, click Done. The Fstop and other information should now show up under the photo.
You will print to a PDF, which you will then upload into the Google Drive Photo folder. Name it 10 10 Contact Sheet.
3/4/2019
So, on to exposure we go....
Basically, expsoure is the amount of light which reaches your camera sensor (or film if you're going old school). It's a critical part of how bright or dark your images appear.
We will be learning how to control the exposure of photos, but first we need to talk about what makes a photo "properly" exposed.
Look at these examples of flower photos....
Then these examples of photos of a dock
https://photographylife.com/underexposure-and-overexposure-in-photography
We started discussing aperture today. Aperture is one of three main elements that helps determine how a photo is exposed. It's the size of the opening that lets light into the camera.
We read this article to understand the basics of aperature and f/stops and depth of field. https://photographylife.com/what-is-aperture-in-photography
3/1/2019
FRIDAY IS THE DAY! If you still need to turn in any projects, you need to do it so that I can get things in the gradebook. There are a number of you who need to submit the photos from the photo safar, as well as your All About Me projectsi!!! I CAN'T GRADE PHOTOS YOU DON'T TURN IN!!!
That said, we are going to play around a bit in Lightroom some more.
Here is a quick tips tutorial, which may be helpful
Today, I want you to play around with the linear and radial selection tools, and the healing brush. These tools allow you to select a portion of the image (or it's inverse) and adjust only portions of a photo. Super helpful if you want to brighten or darken a face, for example. Or if only a portion of your photo is over- or underexposed.
This tutorial goes over linear and radial selection, as well as the healing brush. It is for the web-based app instead of the desktop, but it should work pretty similarly. Yes, you should download the photos onto the desktop so you can follow along. :) The healing brush is amazing--acne be gone!!!
Think about the photos you already turned in, or ones you've taken. Are there some you could do a better job with now that you've learned these skills???? Pick one and use these new tools to make the photo look properly exposed and technically excellent!
2/25/2019
Today, we are going to start our study of the actual DSLR cameras we will be using--the Canon Rebel t6.
Today, please watch this video: https://www.youtube.com/watch?v=NcrYoDY1vNo
Then, once you finish, watch this video: https://www.youtube.com/watch?v=am-yN7yuZXM
While you watch these videos, please fill out the handout I will give you with the parts of the camera.
Today, please watch this video: https://www.youtube.com/watch?v=NcrYoDY1vNo
Then, once you finish, watch this video: https://www.youtube.com/watch?v=am-yN7yuZXM
While you watch these videos, please fill out the handout I will give you with the parts of the camera.
2/8/2019
Today, we are doing to do a little more work in Adobe Lightroom.
Please, download the images here. Drag this folder into your folder on the desktop of your computer.
Next, launch Lightroom and import the images into Lightroom. You may want to put them in a collection of Sept 20 Photos to Edit.
Your task for today and the next time we have class is to edit these photos in Lightroom. Make the necessary adjustments to enhance the images. Crop them, if necessary. Adjust the horizon if necessary. Adjust the white balance. If a photo needs to be lightened or darkened, try the exposure sliders, or the other sliders (highlights, shadows) that allow you to adjust the brightness. You can adjust the vibrancy or the color saturation if you feel that needs to happen.
Your goal is to have an improved, NATURAL-LOOKING image.
More details tomorrow about how to submit your adjusted photos. :)
2/4/2019
Hi, all! I am writing these plans Sunday night, while it is lightly snowing at my house. I have no idea if we will have a late start or a regular period, but if we have school, I will not be there as the LA teachers will be scoring District Writing Assessments.
I promised that you could have more time to work on your All About Me projects. Please make sure your 25 photos are saved into your Photo folder in Google Drive, as well as your presentation. These are due at the end of class.
PHOTO I STUDENTS:
Wednesday, we will spend some time getting familiar with Adobe Lightroom. This photo organization and editing software is what we will be using to enhance and edit our photos to make them the best they can be.
Please watch this tutorial about Adobe Lightroom. Then, watch this tutorial to learn how to upload photos into Lightroom. This tutorial will show you how to organize your photos in Lightroom. Please use the headphones attached to your computer, and hang them up neatly when you are done.
PHOTO II/III STUDENTS:
Your project for the week is to pick one of the categories from the state photo contest and shoot at least 50 different pictures that fit in the category. You will receive completion points for taking the 50 pictures. You will pick your best 4 photos, which will be evaluated for quality.
You may choose any of the following categories: Abstract, animal, documentary, still life, portrait, architecture, camera phone, landscape, people
See the rules brochure for detailed information about each category.
1/30/2019
We worked on our All About Me presentations, and also made sure we uploaded our photo safari photos. :)
1/28/2019
Today, we are going to continue with our presentations. You will need your notes to start your All About Me project.
The All About Me project is a chance for you to demonstrate your understanding of several of the design and composition elements from our presentations. It's also a chance to introduce yourself to the class. You will be using your cell phone to take these pictures. We will be uploading the photos and making a Google Slides presentation in class. These presentations will be due at the end of class on FRIDAY.
On Wednesday, we'll be taking a little "photo safari" around to building to practice looking for these design and composition elements while we take photos with our cell phones.
1/25/2019
Started our design and composition presentations. You should have been taking notes. :)
1/24/20149
Today we are going to finish up our design and composition projects and start making presentations!
1/23/2019
Welcome to Photography! I'm so excited to have you in class!!
Today, we are going to start our study of design and composition. So much of great photography is about telling a story, and design and composition elements can help you tell that story.
We started researching elements of design and composition. The assignment sheet can be found here. These presentations should be done by the end of the period today, since you have about an hour to work. When you are done, please share the presentation with me--either through Google or attach the presentation to an email and send it to me at [email protected].
We will start doing presentations TOMORROW in class.
State photo contest information
We have a state photo contest--how cool is that?!?!?
It's not until March, but you can upload your photos to the Mount Si State Photo Contest Repository starting now, so that you can be entered even if you don't have photography next semester.
How do you enter? Click on this link, and read the contest information PDF. Pick your most amazing photos, figure out what category they belong in, create a folder in that category and title it with your first and last name. Then, put the photo(s) that fit that category in that folder.
As far as I know, it's free for you to enter, and it's a chance to get some recognition for your best work. :)
1/14/2019
Today, we will finish our Classroom Based Assessment. Please create a Google Doc and title it Classroom Based Assessment. This Google Doc needs to be saved in your Photo I/II/III Folder by the end of the period TODAY.
On this document, answer the following questions, using complete sentences and photographic/compositional vocabulary of visual arts correctly.
You may use the glossary below:
aperture: an adjustable opening in a camera lens that allows light into the camera
center of interest: the area of a composition that attracts the viewers’ attention; also called the focal point
composition: the use of the principles of design to arrange the elements of visual arts to create a piece of artwork; the way individual design elements are combined to express a particular idea
contrast: the difference between light and dark tones in an image
depth-of-field scale: a measurement (in feet or meters) on a camera that indicates what portions of the depth-of-field zone will be acceptably sharp at a given aperture
dominance: a principle of design; the way an artwork shows emphasis; a way of organizing a composition so that one element or object in the composition is the strongest or most important part of the work (see also emphasis)
emphasis: a principle of design; the importance assigned to certain objects or areas in an artwork; color, texture, shape, space, and size can be used to create a focal point or center of interest (see also dominance)
focal length: the length of a lens (measured in millimeters) from the center point to the image sensor when the lens is focused at infinity
focus: the maximum clarity or sharpness of an image frame or photographic
framing: the visible area that makes up an image: typically, the view in the viewfinder or camera’s monitor; the shape of a picture as determined by a digital sensor, typically rectangular; also called format
highlight: the brightest area of an image that is illuminated by a light source
photography: the process of forming and fixing an image of an object by the chemical action of light and other forms of radiant energy on photosensitive surfaces; the art and business of producing and printing photographs proportion: a principle of design; the relationship of parts to a whole or parts to one another in regards to size and placement
rule of thirds: a rule that dictates placing the center of interest in an image on one of the crosspoints of a grid
On this document, answer the following questions, using complete sentences and photographic/compositional vocabulary of visual arts correctly.
- Give one example of how you used directional studio lighting techniques or computer software techniques/tools to create contrast and/or a range of values for cast shadows, highlights, and/or reflections.
- Describe in detail how you used the rule of thirds to emphasize the focal point
- Describe in detail how you used a shallow depth of field.
- Describe in detail the item(s) that you photographed and why you placed the item or items in that arrangement.
You may use the glossary below:
aperture: an adjustable opening in a camera lens that allows light into the camera
center of interest: the area of a composition that attracts the viewers’ attention; also called the focal point
composition: the use of the principles of design to arrange the elements of visual arts to create a piece of artwork; the way individual design elements are combined to express a particular idea
contrast: the difference between light and dark tones in an image
depth-of-field scale: a measurement (in feet or meters) on a camera that indicates what portions of the depth-of-field zone will be acceptably sharp at a given aperture
dominance: a principle of design; the way an artwork shows emphasis; a way of organizing a composition so that one element or object in the composition is the strongest or most important part of the work (see also emphasis)
emphasis: a principle of design; the importance assigned to certain objects or areas in an artwork; color, texture, shape, space, and size can be used to create a focal point or center of interest (see also dominance)
focal length: the length of a lens (measured in millimeters) from the center point to the image sensor when the lens is focused at infinity
focus: the maximum clarity or sharpness of an image frame or photographic
framing: the visible area that makes up an image: typically, the view in the viewfinder or camera’s monitor; the shape of a picture as determined by a digital sensor, typically rectangular; also called format
highlight: the brightest area of an image that is illuminated by a light source
photography: the process of forming and fixing an image of an object by the chemical action of light and other forms of radiant energy on photosensitive surfaces; the art and business of producing and printing photographs proportion: a principle of design; the relationship of parts to a whole or parts to one another in regards to size and placement
rule of thirds: a rule that dictates placing the center of interest in an image on one of the crosspoints of a grid
1/11/2019
It's been a while since I updated--
We spent the week working on our classroom-based assessment (photos of snack food) and our portfolios.
We spent the week working on our classroom-based assessment (photos of snack food) and our portfolios.
1/2/2019
Happy New Year!!
Today, we are going to start work on our portfolio project. We will be presenting these during our final period. :) We will have one other project between now and then, but I want to give you plenty of time to get started on this project.
For your portfolio, you will select your 10 BEST images of the semester. These images can come from any project you have done for this class.
You will want to make sure you have cropped them and edited them to perfection. They should be dropped appropriately. Horizons should be level. Whites should be white and blacks should be black. You may want to consider if they should be full color or black-and-white.
Once you select your 10 photos, you will make a Google Slide presentation (or Powerpoint or Adobe Spark) of your portfolio. You need to start the presentation with a title slide that includes your name and the title of your project. After that, you should have ONE image per slide, The image should take up most of the slide, with a small border around all four sides. ((Obviously, if you have a vertical photo, it's going to have wide margins on the sides.) The background should be solid white or solid black, whichever one you think looks best with the photo.
These presentations should be done by MONDAY, JANUARY 14. We will present these portfolios during class on JANUARY 16. You will be expected to introduce yourself and show your photos. You won't have to talk about each photo, but you need to be prepared to speak about what you like best about each photo. I will ask you randomly, so you will likely have to talk about 2 or 3 of your pictures.
Friendly reminder--you may have to download photos (export) from Lightroom to get them into your presentation. That can be annoying, so make sure you use your class time effectively and get that done. :)
12/17/2018
Today,we are going to make reflectors for our still life pictures. We will try not to cut ourselves on the cardboard and/or aluminum foil dispenser in doing so! :)
We should have time to play around with the reflectors and our cell phone flashlights to see how the reflectors can be used to bounce light onto specific objects or areas in photos.
We should have time to play around with the reflectors and our cell phone flashlights to see how the reflectors can be used to bounce light onto specific objects or areas in photos.
12/14/2018
We are going to start taking still life photos on Monday. In preparation for this activity, please read the articles below.
Complete Guide to Still Life Photography
Examples of Still Life photos
One of the big challenges with still life photography is LIGHTING. It is possible to use natural light for still life photos. Watch this video here for some tips about how to do that. We're going to make some reflectors on Monday, using this technique.
When you have a group of objects close together, the objects cast shadows on each other. Sometimes, that is cool. Sometimes, the shadow from one image makes it hard to see the other objects, and it is definitely NOT cool. To fix this, you often need to add an outside light to help fill in the shadows the other objects cast on each other.
Here are some articles about how that works. Please be aware that we do NOT have a softbox, which is mentioned in many of these articles and videos. We do have some LED lgihts, and we can also use things like cell phone flashlights to provide external light, along with the reflectors we are going to build on Monday.
Still Life Lighting for beginners
Lighting for Still Life photographs--this one is really good at explaining the difference between hard light and soft light, and why the direction of the light matters. This is REALLY important to understand--not just for this assignment, but for the fine arts CBA we will be doing.
If people are interested, in addition to a plain background, we can try to make a bokeh wall. How cool does this look??? Here's another way to set it up. We don't have cool gels to turn the background different colors, but you know how to do that in Lightroom now. :)
Over the weekend, you need to think about what objects you might want to bring in to photograph. I will bring some fruit/vegetables, but if you want to bring something else to photograph, please make sure you bring it on Monday.
PLEASE make sure you put the headphones away neatly when you are done. The cord should be wrapped around them, they should be hung back up in the little hook jobbie, and they need to be plugged in the jack on the BACK of the computer. Make sure you log off, pick up any trash, and push in your chair.
See you Monday!!
12/12 - 12/13/2018
We had time to finish up the white balance project and to finish any other makeup work we might have.
12/10/2018
Today, weare going to learn about the various white balance settings on our SLR cameras!
Read this little article here, about the various settings. https://cpn.canon-europe.com/content/education/infobank/white_balance/white_balance.do
Then, we are going to grab the cameras and practice taking pictures on ALL of the white balance settings. For this camera, this means Auto, Daylight, Shaded, Cloudy, Tungsten, Flourescent, Flash and Custom.
Basically, you are going to go to three locations in the building and one outdoor setting. You will take EIGHT pictures of the same object/scene--one using each of the white balance settings. You will need to bring a sheet of white paper with you to set the custom white balance.
Location One: This classroom
Location Two: Wildcat Court
Location Three: The Gym
Location Four: Out by the Gazebo
When you are done taking all 32 pictures, you will upload and make a contact sheet. (We may need to do this on Wednesday if we don't have enough time).
12/6-12/7/2018
We worked on our photo essays.
I did a LOT of grading.
You worked on getting your missing assignments turned in. :)
I did a LOT of grading.
You worked on getting your missing assignments turned in. :)
12/5/2018
BRRRRRRRRRRRRRRRRRRRRRR!
We braved the cold and went outside to take pictures of frost. Then we uploaded and did some editing in Lightroom.
Next, we are going to create a photo essay (or maybe some of you think of this as a collage, even though I hate that term). To figure out how to do that, read the steps here.
We braved the cold and went outside to take pictures of frost. Then we uploaded and did some editing in Lightroom.
Next, we are going to create a photo essay (or maybe some of you think of this as a collage, even though I hate that term). To figure out how to do that, read the steps here.
12/3/2018
Hey all! I am still out with my husband, but the good news is that he is healing SO WELL, and I will be back at school once he gets his stitches out Tuesday morning. Whoo hoo! Ive missed you guys.
Wednesday, we are going to go out and do some shooting on Manual Mode. If it is not raining, we will go outside as soon as the sun comes up. Be aware--the weather forecast is that it will be COLD on Wednesday, so please dress appropriately for being outside for up to an hour in sub-40 degree weather (that means long pants and a coat. Maybe a hat and gloves, too).
I am super hopeful we may be able to get some good frost pictures if it really is as cold as the weather forecast says. :)
Today, you are going to spend some time using the Canon camera simulator again. We used this to practice on AV and TV mode, but it also has a M setting to practice manual mode. In this mode, you control aperture, shutter speed AND ISO. The nice thing about the simulator is that it will tell you if your image is over or underexposed before you snap the picture--unlike in real life. The idea is for you to practice with some different tasks, so hopefully Friday will be less frustrating for you.
To complete this task, open up the Canon camera simulator at http://www.canonoutsideofauto.ca/play/ Make sure you click on the Manual Mode button to
On a sheet of paper, write down what settings you used to get a "good exposure" for each of the problems below.
1. Shallow depth of field, invisible motion.
2. Deep depth of field, invisible motion
3. Shallow depth of field, blurred motion
4. Deep depth of field, blurred motion
5. Shallow depth of field, stopped motion
6. Deep depth of field, stopped motion
7. if you want to make the motion stop, but want a deep depth of field, what problem did you run into? What are your options for solving this problem? Come up with at least three potential solutions to this problem.
Then, after you complete these questions, take the "challenge." Keep trying until you get all six images right. :)
Please give your sheet to the sub when you are done.
When you're done with that, you are going to play around in Lightroom to make a Spotify Duotone effect.
First, pick a picture you have already taken for this class. Then, watch this video. https://www.youtube.com/watch?v=WBHhAGBDbL0. Make a red/blue "Spotify Duotone" version of your picture. Then, make a version of the photo using custom colors of your choice. :) Save all three images on a contact sheet and save in your Photo I/II/III folder.
11/30/2018
You had time to finish up your Lightroom project and any other work you haven't turned in.
You also watched another episode of Tales by Light.
You also watched another episode of Tales by Light.
11/29/2018
We are going to watch a couple of episodes of a pretty groovy Netflix series about photography and photographers today. :)
The first episode, especially, has a lot of clips of the photographer talking about HOW and WHY he takes pictures. Take that to heart, and think about how it can apply to you taking pictures in and out of this class. :)
The first episode, especially, has a lot of clips of the photographer talking about HOW and WHY he takes pictures. Take that to heart, and think about how it can apply to you taking pictures in and out of this class. :)
11/28/2018
Hi guys-still at home with my husband today. The great news is that his eye is just fine. The bad news is that it is pretty obvious that he has a moderately bad concussion. So, I'm still at home today and may not be here tomorrow, either. Thanks for being cooperative and well-behaved for the sub!
oday, we're going to do some room in Lightroom and learn how CHANGE THE COLOR OF AN OBJECT! Sweet, right???
First, select two of the photos you have already taken for this class, and open them in Lightroom.
Then, watch this video: https://www.youtube.com/watch?v=0lCPsiCxShU It will explain how to change the color of an object in a photo using Lightroom.
Pick one of the two photos, start to follow the steps outlined in the video. While the guy in the video says he is doing a "quick job," I expect you to do a careful and through job "painting" the object you want to change the color of. Really take your time, and make sure every part of the object that you want to change the color of is "painted" and that nothing you don't want to change the color of is. Then, change the color of the object. Make the new color something completely different and unexpected! Refine your color until you get it exactly the way you want it, and then save the edited image.
Do this with the other image as well. Same thing--do a nice careful job "painitng" the image, then pick a new and different color.
Then, watch these two videos to learn how to make one object colored and the rest of the photo black and white (Sin City of Pleasantville Effect): https://www.youtube.com/watch?v=EDUN_pUiZkQ and https://www.youtube.com/watch?v=CJuqR3
Pick on of the two original photos you used, and edit it so that one object is in color, and the rest of the image is black and white.
When you are done editing , please make a contact sheet that contains both original images and all three edited images and save it in your Photo I/II/III folder.
PLEASE make sure you hang the headphones up neatly when you are done. I believe the cords are wrapped around them and they are hung on the little hook jobbie on the side of the monitor. Please make sure they are returned to this condition. :)
1/26/2018
Hi, all! Hope you had a great Thanksgiving break!
I'm going to be gone today and tomorrow. Our Thanksgiving weekend took an unexpected detour when we were out running errands and a rather large tree branch broke through the windshield of our car while we were driving. Cora and I are okay, but my husband was injured when the branch hit him above the eyebrow. Fortunately, we were incredibly lucky, and his only injury was a rather nasty gash on his forehead. He is still in a lot of pain and can't drive, so I will be home with him for at least the next two days. I may be at school on Wednesday--it all just depends on his follow-up appointment schedule and pain level.
So, while I'm at home working on my personal gratitude project of caring for my husband, you're going to make a contact sheet of your gratitude project in Lightroom. I want you to make two contact sheets. Put all of your 10 photos on one contact sheet. Make them as big as you can! Then, make another contact sheet with your best four photos. Make sure you crop and adjust these best 4 photos as necessary before making your contact sheet. :) Please make sure you are setting the caption so it shows the exposure.
It's been a while since we downloaded from our phones. The last time we did that, we just used the Google Drive app on our phones to save the photos, then opened up Google Drive on the desktop and downloaded the photos. If you need help, ask a classmate--I am sure there are people that can help you.
Save these two contact sheets in your Photo I/II/III folder in Google Drive.
Thanks so much!!
11/19/2018
This week, I am giving you a short project to work on. For most of you, I imagine you will be taking these pictures on Thursday. :) It is TOTALLY fine for you to use your cell phone cameras for this project.
For this project, you will be submitting 10 photos that show GRATTITUDE. How you choose to interpret "grattitude" is up to you, but it could include things or people you are grateful for and/or people demonstrating grattitude.
We will be uploading these pictures in class MONDAY.
Then, we had the class period to work on getting makeup work turned in.
11/15/2018
I'm not at school today. So, here's what you're going to do in my absence (other than be nice to the sub, which goes without saying):
Below are four images. Download them onto your computer, and then upload into Lightroom. Edit the photos appropriately for exposure, color balance and composition. Please crop as you see fit so that the subject/center of interest is clear. You may want to consider cropping horizontal photos vertically or vertical photos horizontally. Please make sure the horizon is straight if it is not level.
When you are done adjusting, please make a contact sheet and call it NOV 15 EDITING and put it in your Photo I/II/III folder.
If you finish before class is out and you still have missing assignments, GET THOSE TURNED IN!!!
| img_1636.jpg |
| img_2509.jpg |
| img_2548.jpg |
| img_7064.jpg |
11/14/2018
I passed back score sheets for our recent photography projects. If you didn't get yours today, it was in fact the cat who knocked part of the pile on the floor. Dang it, Gilbert! I will have those for you the next time we have class.
As a good number of you may have noticed, I put 0s in the gradebook for missing assignments. :( Today, those of you with missing assignments need to turn them in, rename them, or move them to a location where I can find them easily. I will check your Photo I/II/III folders before class ends to get those submitted assignments in the gradebook asap.
We also talked about some of the issues with the TV project--namely how many of you just didn't follow rules of composition AT ALL on this project. While the focus (hah!) of this project was motion blur and stopped motion, all of the rules of composition we've learned still apply. I shouldn't be seeing things like photos with people's heads, arms, or legs chopped off, or a bunch of dead space on the side of photos, or tilted horizons.
So, if you are unhappy with your grade on some of the photos in this project, you have a chance to revise. Read the comments on your photos and fix things like cropping and tilted horizons. Adjust for color balance if necessary. And, honestly, you may just need to pick different photos.
When you do this, I will grade the revised photos and make adjustments. :)
11/8-11/9/2018
Work time on Everyday Object project! Submit by the end of class on Friday. :)
11/7/2018
I'm super excited for our next project! I'm calling it EVERYDAY OBJECT.
Your task for this project is to take FIFTEEN different pictures of an everyday object. This object should be relatively small. It should also be something familiar. We're talking a pen, a mug, a cell phone, makeup, a shoe, your binder, a book, your backpack. Honestly, you can pick almost anything, as long as it is relatively small and school appropriate.
You must use the same object for all of the photos.
For this project, you are going to take 15 photos. Each of these 15 photos needs to be fundamentally different from all the others. This means that while the photos are of the same overall object, each photo needs to be different from all the others. To accomplish this task, you can:
Please note: For this project, it is not necessary--or recommended--to move the object. This isn't about having a bunch of different backgrounds. It's about using the camera to take different images that focus on the object--or a portion of the object--itself.
In some ways, this project is similar to your "all about me" project from the beginning of the semester. Except, instead of being all about YOU, this project is all about THE OBJECT you choose. Now that you are familiar with TV and AV modes, and understand exposure, and know a variety of composition techniques, this is a chance to showcase your abilities!
And, as always, your finished images should be cropped and adjusted (just for exposure and color balance, really) in Lightroom.
You will take pictures today. You should be talking at least twice as many photos as you think you need, so you can pick the best ones. Then, you will upload. Tomorrow and Friday, you will make a contact sheet with your 15 selected photos. Then, Monday, we will learn how to take these images and make a Photo Essay. :)
Your task for this project is to take FIFTEEN different pictures of an everyday object. This object should be relatively small. It should also be something familiar. We're talking a pen, a mug, a cell phone, makeup, a shoe, your binder, a book, your backpack. Honestly, you can pick almost anything, as long as it is relatively small and school appropriate.
You must use the same object for all of the photos.
For this project, you are going to take 15 photos. Each of these 15 photos needs to be fundamentally different from all the others. This means that while the photos are of the same overall object, each photo needs to be different from all the others. To accomplish this task, you can:
- Photograph different portions of the object
- Use depth of field and selective focus to highlight different portions of the object
- Use different composition techniques (angle up, angle down, framing, etc)
- Use a different focal length (extreme close-up to the entire object)
Please note: For this project, it is not necessary--or recommended--to move the object. This isn't about having a bunch of different backgrounds. It's about using the camera to take different images that focus on the object--or a portion of the object--itself.
In some ways, this project is similar to your "all about me" project from the beginning of the semester. Except, instead of being all about YOU, this project is all about THE OBJECT you choose. Now that you are familiar with TV and AV modes, and understand exposure, and know a variety of composition techniques, this is a chance to showcase your abilities!
And, as always, your finished images should be cropped and adjusted (just for exposure and color balance, really) in Lightroom.
You will take pictures today. You should be talking at least twice as many photos as you think you need, so you can pick the best ones. Then, you will upload. Tomorrow and Friday, you will make a contact sheet with your 15 selected photos. Then, Monday, we will learn how to take these images and make a Photo Essay. :)
11/5/2018
Lots of you had issues not having access to cameras while I was gone, so today was a catch-up day to get projects completed and turned in.
11/2/2018
Your TV Mode Projects are due today!
Please make sure your contact sheet with 24 photos is named TV Project #1 and is saved in your Photo I/II/III folder in Google Drive so I can find it!
Please make sure your contact sheet with your best 4 photos is named TV Project Best and s saved in your Photo I/II/III folder in Google Drive so I can find it!
These are due at the end of the period TODAY!
11/1/2018
Today is a work day on your TV Mode Project!
You should be making a contact sheet with 24 photos--12 where the motion is DELIBERATELY blurry and 12 where the motion is stopped.
Once you get your 24 photos on yoru contact sheet, you need to add captions to these photos. Use the Photo Info menu in the Page section to add the caption. Click "edit" at the bottom of the window that pops up. Then, look for EXIF Data in the window that pops up. Select Exposure and click insert. Then, click Done. The shutter speed and f/stop information should now show up under the photo.
Then, you need to pick your BEST four photos. In Lightroom, edit these photos as necessary. Crop them to the rule of thirds, and do any necessary adjustments so they are properly exposed. If you need to remove a color cast (you will if you shot pictures in the gym), do that as well. You should not need to do any more adjustments than those basic ones, however.
Then, put those four photos on a contact sheet, and include the same caption information.
10/29/2018
Oh my goodness! Get your AV Mode Projects in your Google Drive folder so I can start grading!!!
Today, we will start our next project, the TV Mode Project! This project will be focused on MOTION--stopping motion and deliberate motion blur. :)
Today, we will start our next project, the TV Mode Project! This project will be focused on MOTION--stopping motion and deliberate motion blur. :)
| tv_mode_photo_project.docx |
I will be gone Thursday and Friday, on an out-of-state field trip. I cannot guarantee that the sub will have ANY experience with photography at all. You should be able to do all of the tasks in this project well enough by now to help anyone who gets stuck. :)
10/26/2018
We went over the Photography Rubric, which will be used for all photo projects from here on out.
| photography_rubric.docx |
Then, we had time to work on our project.
10/25/2018
We used our class time today to work on our contact sheets for our AV Mode Project.
This project is due tomorrow at the ed of class. If you need more time due to being absent on our photo walk, please talk to me to set up an alternate deadline.
This project is due tomorrow at the ed of class. If you need more time due to being absent on our photo walk, please talk to me to set up an alternate deadline.
10/24/2018
We went on our "field trip" to the bridge today, shooting photos for our AV Mode Project, which is due Friday.
We will have time in class Thursdsay and Friday to edit photos and to make contact sheets. :)
We will have time in class Thursdsay and Friday to edit photos and to make contact sheets. :)
10/22/2018
I collected field trip forms for our walking field trip on Wednesday. The weather report still looks good: partly cloudy is PERFECT. We will be walking to Meadowbrook Bridge and back during our block period.
If you did not return the field trip form today, you MUST return it on Wednesday. If you do not, you will not be able to go. :(
Then, I discussed the AV Mode Project we will be working on during our field trip!
If you did not return the field trip form today, you MUST return it on Wednesday. If you do not, you will not be able to go. :(
Then, I discussed the AV Mode Project we will be working on during our field trip!
| av_mode_photo_project.docx |
10/19/2018
I gave you a SUPER IMPORTANT FIELD TRIP FORM today in class. This is the permission form for ALL of our off-campus walking field trips this semester. Please have a parent/guardian sign this form, and return it to me on MONDAY. If the weather is nice, we will take a walk down to the Meadowbrook Bridge on Wednesday to shoot some AV mode photos!!!
Then, we used the rest of the period to get our Exposure and Aperture contact sheets saved into your Google Drive photo folder so that I can get them scored and in the gradebook!
Homework: Have an amazing Homecoming, and make good choices! Get your permission slip signed!
Then, we used the rest of the period to get our Exposure and Aperture contact sheets saved into your Google Drive photo folder so that I can get them scored and in the gradebook!
Homework: Have an amazing Homecoming, and make good choices! Get your permission slip signed!
10/18/2018
Today, you are going to play around with Camera Sim. It's another cool online camera simulator.
For ALL of the exercises you are going to do, mmake sure your FOCAL LENGTH is set for 50mm. The lenses we have on the class cameras are 50mm prime lenses, so I want you to practice with what we have. You only get to take 15 total "photos" on Camera Sim, so this is definitely a challenge to see if you can accomplish the tasks with only your 15 photos!! (If you need more than 15 photos, just open an incognito window and try again!)
When you get a properly exposed photo, write down the F stop, shutter speed and ISO (it will tell you this underneath the photo) on a sheet of paper.
Photo 1: 50mm, f/22, 1/400 sec, ISO 1600
AV MODE--Please set Camera Sim to Aperature Priority Mode.
Photo 1: Please set lighting to "Sunny" and take a picture where the motion of the pinwheel is stopped and the depth of field is deep (the entire background is in focus). You may need to adjust the ISO. When you get a properly exposed photo, write down the F stop, shutter speed and ISO (it will tel you this underneath the photo).
Photo 2: Pleas set the lighting to "Partly Cloudy" and take a picture where the motion of the pinwheel is stopped and the depth of field is shallow (the background is blurry).
Photo 3: Set the Lighting for "Bright Indoor" and take a properly exposed photo where the depth of field is deep (the background is in focus). Hint: The pinwheel will be blurry.
Photo 4: Set the Lighting for "Dim Indoor" and take a properly exposed photo where the depth of field is shallow (the background is blurry). Hint: you may want to click the tripod button for this one. :)
TV MODE--Please Set Camera Sim to Shutter Priority Mode
Photo 5: Please set lighting to "Sunny" and take a picture where the motion of the pinwheel is stopped.
Photo 6: Please set lighting to "Overcast" and take a properly exposed photo where the girl is in focus, but the pinwheel is blurry
Then, answer these questions:
7. If you want to take a portrait, should you use AV or TV mode? Why?
8. If you're shooting a gymnastics meet, should you use AV or TV mode? Why?
9. If you want to ensure the background of your photo is blurry, should you use AV or TV mode? Why?
10. If you're shooting landscapes and want everything to be in focus, should you use AV or TV mode? Why?
11. if you are taking pictures in a darkened room, should you use AV or TV mode? Why?
12. If you are taking pictures at night, should you use AV or TV mode? Why?
10/16/2018
Today, we are going to talk about the other two sides of the exposure triangle: shutter speed and ISO.
ISO used to be known as film speed, but hey, we don't use film anymore. We still use the term ISO to talk about "sensitivity to light" even though that's not really how a digital camera works. The ISO settings allow you to compensate for the ambient light and get a properly-exposed photo. If you are in direct, bright sunlight, you would select an ISO of 100. If you're shooting in a very dark room, you may need to adjust the ISO to 3200 to get a properly exposed photo. The problem with changing the ISO is that, as the number increases, so does the "grain" or "noise" of the image--at 3200, an image may look like it's spotted or sort of pixelated. It's a tradeoff--you have to balance the need to expose the photo properly with the additional grain.
I think of ISO like this--if you've set the shutter speed and aperture properly for the photo you want to take, and the image is still to dark or too bright--you need to adjust the ISO to adjust the "brightness" of the photo.
Shutter speed is like opening a door--the longer the door is open, the more light is let in. Also, the more motion the sensor captures. So, if you want to stop motion, you need to have a fast shutter speed.
Shooting in TV mode allows you to set the shutter speed, and the camera will adjust the aperture and ISO as necessary to get a properly exposed photo. Very useful for situations when your priority is stopping the motion--like shooting sports or other action photos (and the opposite, if you are deliberately trying to blur motion).
Here a couple of articles that break down these concepts in a pretty clear manner:
Shutter speed, explained
What ant to know more about ISO? Read this to find out
Canon, the manufacturer of our cameras, has a cool interactive simulator on their website. Start here, and click on the "learn" tab to review the concepts of exposure and shutter speed. Then, when you're done reviewing that section, click on the "Play" tab. This will take you to a cool simulator, where you can "take pictures" in AV and TV modes, as well as full manual mode.
http://www.canonoutsideofauto.ca/challenge/
Once we all were successful with the challenge, we went to the gym and tried our hand at shooting in TV mode, to get the action stopped at some PE volleyball games.
You just need to make sure that you upload the photos today--we'll do more with them tomorrow!
10/15/2018
We took our photos from Friday and made a contact sheet in Lightroom. It should have the four photos you took, at F/1.8, f/7.1, f/11 and f/22. Once you get them on the contact sheet, make sure to go under the Pages tab on the right hand side of the screen and click on Photo Info. Make sure you select "Exposure" from the menu on the right. This will put the exposure of each photo in the caption under the photo! Super cool!
Then, "Print" the contact sheet as a PDF. Name it "YourName Aperture" and save it in the Photo I/II/III folder in your Google Drive!
Then, "Print" the contact sheet as a PDF. Name it "YourName Aperture" and save it in the Photo I/II/III folder in your Google Drive!
10/12/2018
There was some confusion about yesterday's assignment, so we went out to the gazebo and took more photos in AV mode. You each took four photos, one at f/1.8, one at f/7.1, one at f/11 and one at f/22.
The purpose of taking these four photos at these f stops was to see the difference in the depth of field--how the background is very blurred at f/1.8 and in sharp focus in the f/22 image.
Understanding the relationship between aperture and depth of field is very important to taking successful pictures--you want to be able to control the depth of field, which means you need to be able to control the aperture!
10/11/2018
We started discussing aperture today. Aperture is one of three main elements that helps determine how a photo is exposed. It's the size of the opening that lets light into the camera.
We read this article to understand the basics of aperature and f/stops and depth of field. https://photographylife.com/what-is-aperture-in-photography
Then, we learned about AV mode on our cameras. This "semi-automatic" mode is aperature priority. It allows you to set the aperature, and then automatically adjusts other elements like shutter speed and ISO to produce a properly-exposed image with the aperture setting you desire. This mode is awesome when you want to control the depth of field of an image!
We read this article, https://www.slrphotographyguide.com/av-mode/ then went out and shot some photos based on the assignment at the end of the article.
10/10/2018
Today, we are going to learn to make a contact sheet in Lightroom.
A contact sheet is bascially a single document with multiple images on it.
Please follow these step-by-step instructions.
For this assignment, select the 5 x 11 LANDSCAPE template.
When you go to add the photos, please add them in order of exposure compensation. Do this in Library. You should start on the left with your -5 image, then add -4, -3, -3, -1, 0, +1, +2, +3, +4 and +5 in order. If you have done this correctly, the darkest image should be on the far left of your contact sheet, and the brightest image should be on the far right.
I want you to add captions to these photos. Following the directions, use the Photo Info menu in the Page section to add the caption. Click "edit" at the bottom of the window that pops up. Then, look for EXIF Data in the window that pops up. Select Exposure Bias and click insert. Then, click Done. The exposure compensation should now show up under the photo.
You will print to a PDF, which you will then upload into the Google Drive Photo folder. Name it 10 10 Contact Sheet.
10/8/2018
So, on to exposure we go....
Basically, expsoure is the amount of light which reaches your camera sensor (or film if you're going old school). It's a critical part of how bright or dark your images appear.
We will be learning how to control the exposure of photos, but first we need to talk about what makes a photo "properly" exposed.
Look at these examples of flower photos....
Then these examples of photos of a dock
https://photographylife.com/underexposure-and-overexposure-in-photography
10/5/2018
Today, we are going to use our very short 30 minutes to make any necessary adjustments to our texture photos in Lightroom.
This should include: cropping to ensure proper rule of thirds placement, adjusting for exposure if necessary, and color correction (if necssary).
Once you are done with your photos, export them into a folder called 10 4 Edited Photos in your Photo I, II or III folder in Google Drive. :)
This should include: cropping to ensure proper rule of thirds placement, adjusting for exposure if necessary, and color correction (if necssary).
Once you are done with your photos, export them into a folder called 10 4 Edited Photos in your Photo I, II or III folder in Google Drive. :)
10/4/2018
We went on a very short photo safari today, focusing on texture and rule of thirds (as in, your photos should be of a texture, but also need to be following the rule of thirds).
Then we came back, learned how to upload the photos from the card to the computer.
Once photos were uploaded to the computer, we imported them into Lightroom. Some of you were able to start editing, but no worries if you didn't get to that yet!
Then we came back, learned how to upload the photos from the card to the computer.
Once photos were uploaded to the computer, we imported them into Lightroom. Some of you were able to start editing, but no worries if you didn't get to that yet!
10/3/2018
We started working with the new DSLR cameras today. We went over the parts of the camera, how to take out the battery and SD card, how to format the card, and how to remove and attach the lens.
You all passed a quick demonstration "quiz" where you showed me you now have basic camera skills.
Then you went out and shot some photos. :)
You all passed a quick demonstration "quiz" where you showed me you now have basic camera skills.
Then you went out and shot some photos. :)
10/1/2018
Today, we are going to start our study of the actual DSLR cameras we will be using--the Canon Rebel t6.
Today, please watch this video: https://www.youtube.com/watch?v=NcrYoDY1vNo
Then, once you finish, watch this video: https://www.youtube.com/watch?v=am-yN7yuZXM
While you watch these videos, please fill out the handout I will give you with the parts of the camera.
Today, please watch this video: https://www.youtube.com/watch?v=NcrYoDY1vNo
Then, once you finish, watch this video: https://www.youtube.com/watch?v=am-yN7yuZXM
While you watch these videos, please fill out the handout I will give you with the parts of the camera.
9/28/2018
Today, you are going to watch the first half hour of a documentary about the history of photography. It's right here. Please help the sub figure out how to project it on the big screen. Please stop the video when you get to the section about portrait photography.
I want you to write three things that surprised you, or that you thought were interesting, on a half sheet of paper. Make sure you give it to the sub on the way out the door.
Have an amazing weekend!
I want you to write three things that surprised you, or that you thought were interesting, on a half sheet of paper. Make sure you give it to the sub on the way out the door.
Have an amazing weekend!
9/27/2018
We did a little activity today about the history of photography.
9/24/2018
Today is the day! If you still need to turn in any projects, you need to do it TODAY so that I can get things in the gradebook. There are a number of you who need to submit the photos from Friday, as well as from the photo safari!!! I CAN'T GRADE PHOTOS YOU DON'T TURN IN!!!!
Once you do that, we are going to play around a bit in Lightroom some more.
Here is a quick tips tutorial, which may be helpful
Today, I want you to play around with the linear and radial selection tools, and the healing brush. These tools allow you to select a portion of the image (or it's inverse) and adjust only portions of a photo. Super helpful if you want to brighten or darken a face, for example. Or if only a portion of your photo is over- or underexposed.
This tutorial goes over linear and radial selection, as well as the healing brush. It is for the web-based app instead of the desktop, but it should work pretty similarly. Yes, you should download the photos onto the desktop so you can follow along. :) The healing brush is amazing--acne be gone!!!
Think about the photos you already turned in, or ones you've taken. Are there some you could do a better job with now that you've learned these skills???? Pick one and use these new tools to make the photo look properly exposed and technically excellent!
9/21/2018
9/20/2018
Today, we are doing to do a little more work in Adobe Lightroom.
I have placed a folder called Photos to Adjust in your Google Drive. If you can't find it there, download the images here. Drag this folder into your folder on the desktop of your computer.
Next, launch Lightroom and import the images into Lightroom. You may want to put them in a collection of Sept 20 Photos to Edit.
Your task for today and tomorrow is to edit these photos in Lightroom. Make the necessary adjustments to enhance the images. Crop them, if necessary. Adjust the horizon if necessary. Adjust the white balance. If a photo needs to be lightened or darkened, try the exposure sliders, or the other sliders (highlights, shadows) that allow you to adjust the brightness. You can adjust the vibrancy or the color saturation if you feel that needs to happen.
Your goal is to have an improved, NATURAL-LOOKING image.
More details tomorrow about how to submit your adjusted photos. :)
9/19/2018
Today, we looked at people's All About Me presentations.
Then, we were introduced to Adobe Lightroom, one of the photo editing software programs we'll be using in this class. We spent some time exploring the program and adjusting one of our own photos.
Then, we were introduced to Adobe Lightroom, one of the photo editing software programs we'll be using in this class. We spent some time exploring the program and adjusting one of our own photos.
9/17/2018
We worked on All About Me presentations. You shared them with me when you finished.
9/14/2018
Today was a work day. Here's what you worked on.
We will be working on your All About Me presentations in class on Monday. You will need to have all of your photos completed when you come into class.
I also showed you a sample of what your All About Me should look like. Click on the hyperlink to see it. :)
Homework: Finish taking your photos!!!
We will be working on your All About Me presentations in class on Monday. You will need to have all of your photos completed when you come into class.
I also showed you a sample of what your All About Me should look like. Click on the hyperlink to see it. :)
Homework: Finish taking your photos!!!
9/13/2018
I showed you some of the best photos people took on our photo safari. There were some really good ones!
We talked about what elements of composition the pictures contained, and how to make some of the photos even better!
We talked about what elements of composition the pictures contained, and how to make some of the photos even better!
9/12/2018
Thank you for your speedy evacuation and return to class during the fire drill! Well done!
We talked about the need to adjust your camera settings if you are shooting on an iPhone. Go into the settings menu, and scroll down until you find the camera settings. Unclick the "Auto HDR" setting. You can also turn on "Keep Normal Photo" as well. This should make sure that you get a nice JPEG, which can be edited in Photoshop or Lightroom.
Also, if you don't already have the Google Drive app on your phone, please download it. It will make it SO MUCH EASIER to store and submit photos if you do!
We went out around the building and practiced taking pictures that use the elements of RULE OF THIRDS, TEXTURE, LEADING LINES, POINT OF VIEW (BIRD'S EYE or WORM'S EYE), and FRAMING.
When you were done with the safari, you came back to the classroom and logged into Google Drive. In your Photo 1 (or Photo) folder, you created a new folder called 9/12 Photo Safari and uploaded all of your photos from the photo safari!
Homework: Upload your photos if you haven't done so!
9/10/2018
Today, I showed you my example of one set of five photos for the "All About Me" project, and we talked a bit more about the project.
Then, we finished almost all of the presentations of elements of design and composition. I've listed them below for you.
THE ELEMENTS
Perspective
Center of Interest
"The Moment"
Form
Pattern
Leading Lines
Rule of Thirds
Shape
Framing
Format
Cropping
S-Curve
Point of View
Light
Lines
Including Foreground
Color
Positive and Negative Space
Texture
9/7/2018
We did a few more presentations today. We should be able to finish the rest on Monday. :)
I also introduced the "All About Me" photo assignment. This assignment is due NEXT FRIDAY, 9/14
I also introduced the "All About Me" photo assignment. This assignment is due NEXT FRIDAY, 9/14
9/6/2018
We started presenting our design/composition presentations, despite massive technology issues. I passed out a handout for you to use to take notes. (See me if you were gone).
We will continue presentations tomorrow!
We will continue presentations tomorrow!
9/5/2018
I hope you had a great Labor Day weekend!
Today, we are going to start our study of design and composition. So much of great photography is about telling a story, and design and composition elements can help you tell that story.
We started researching elements of design and composition. The assignment sheet can be found here. These presentations should be done by the end of the period today, since you have about an hour to work. When you are done, please share the presentation with me--either through Google or attach the presentation to an email and send it to me at [email protected].
We will start doing presentations TOMORROW in class.
WELCOME!
It was a great, if hectic, first week! So glad to meet you and start our study of photography together!

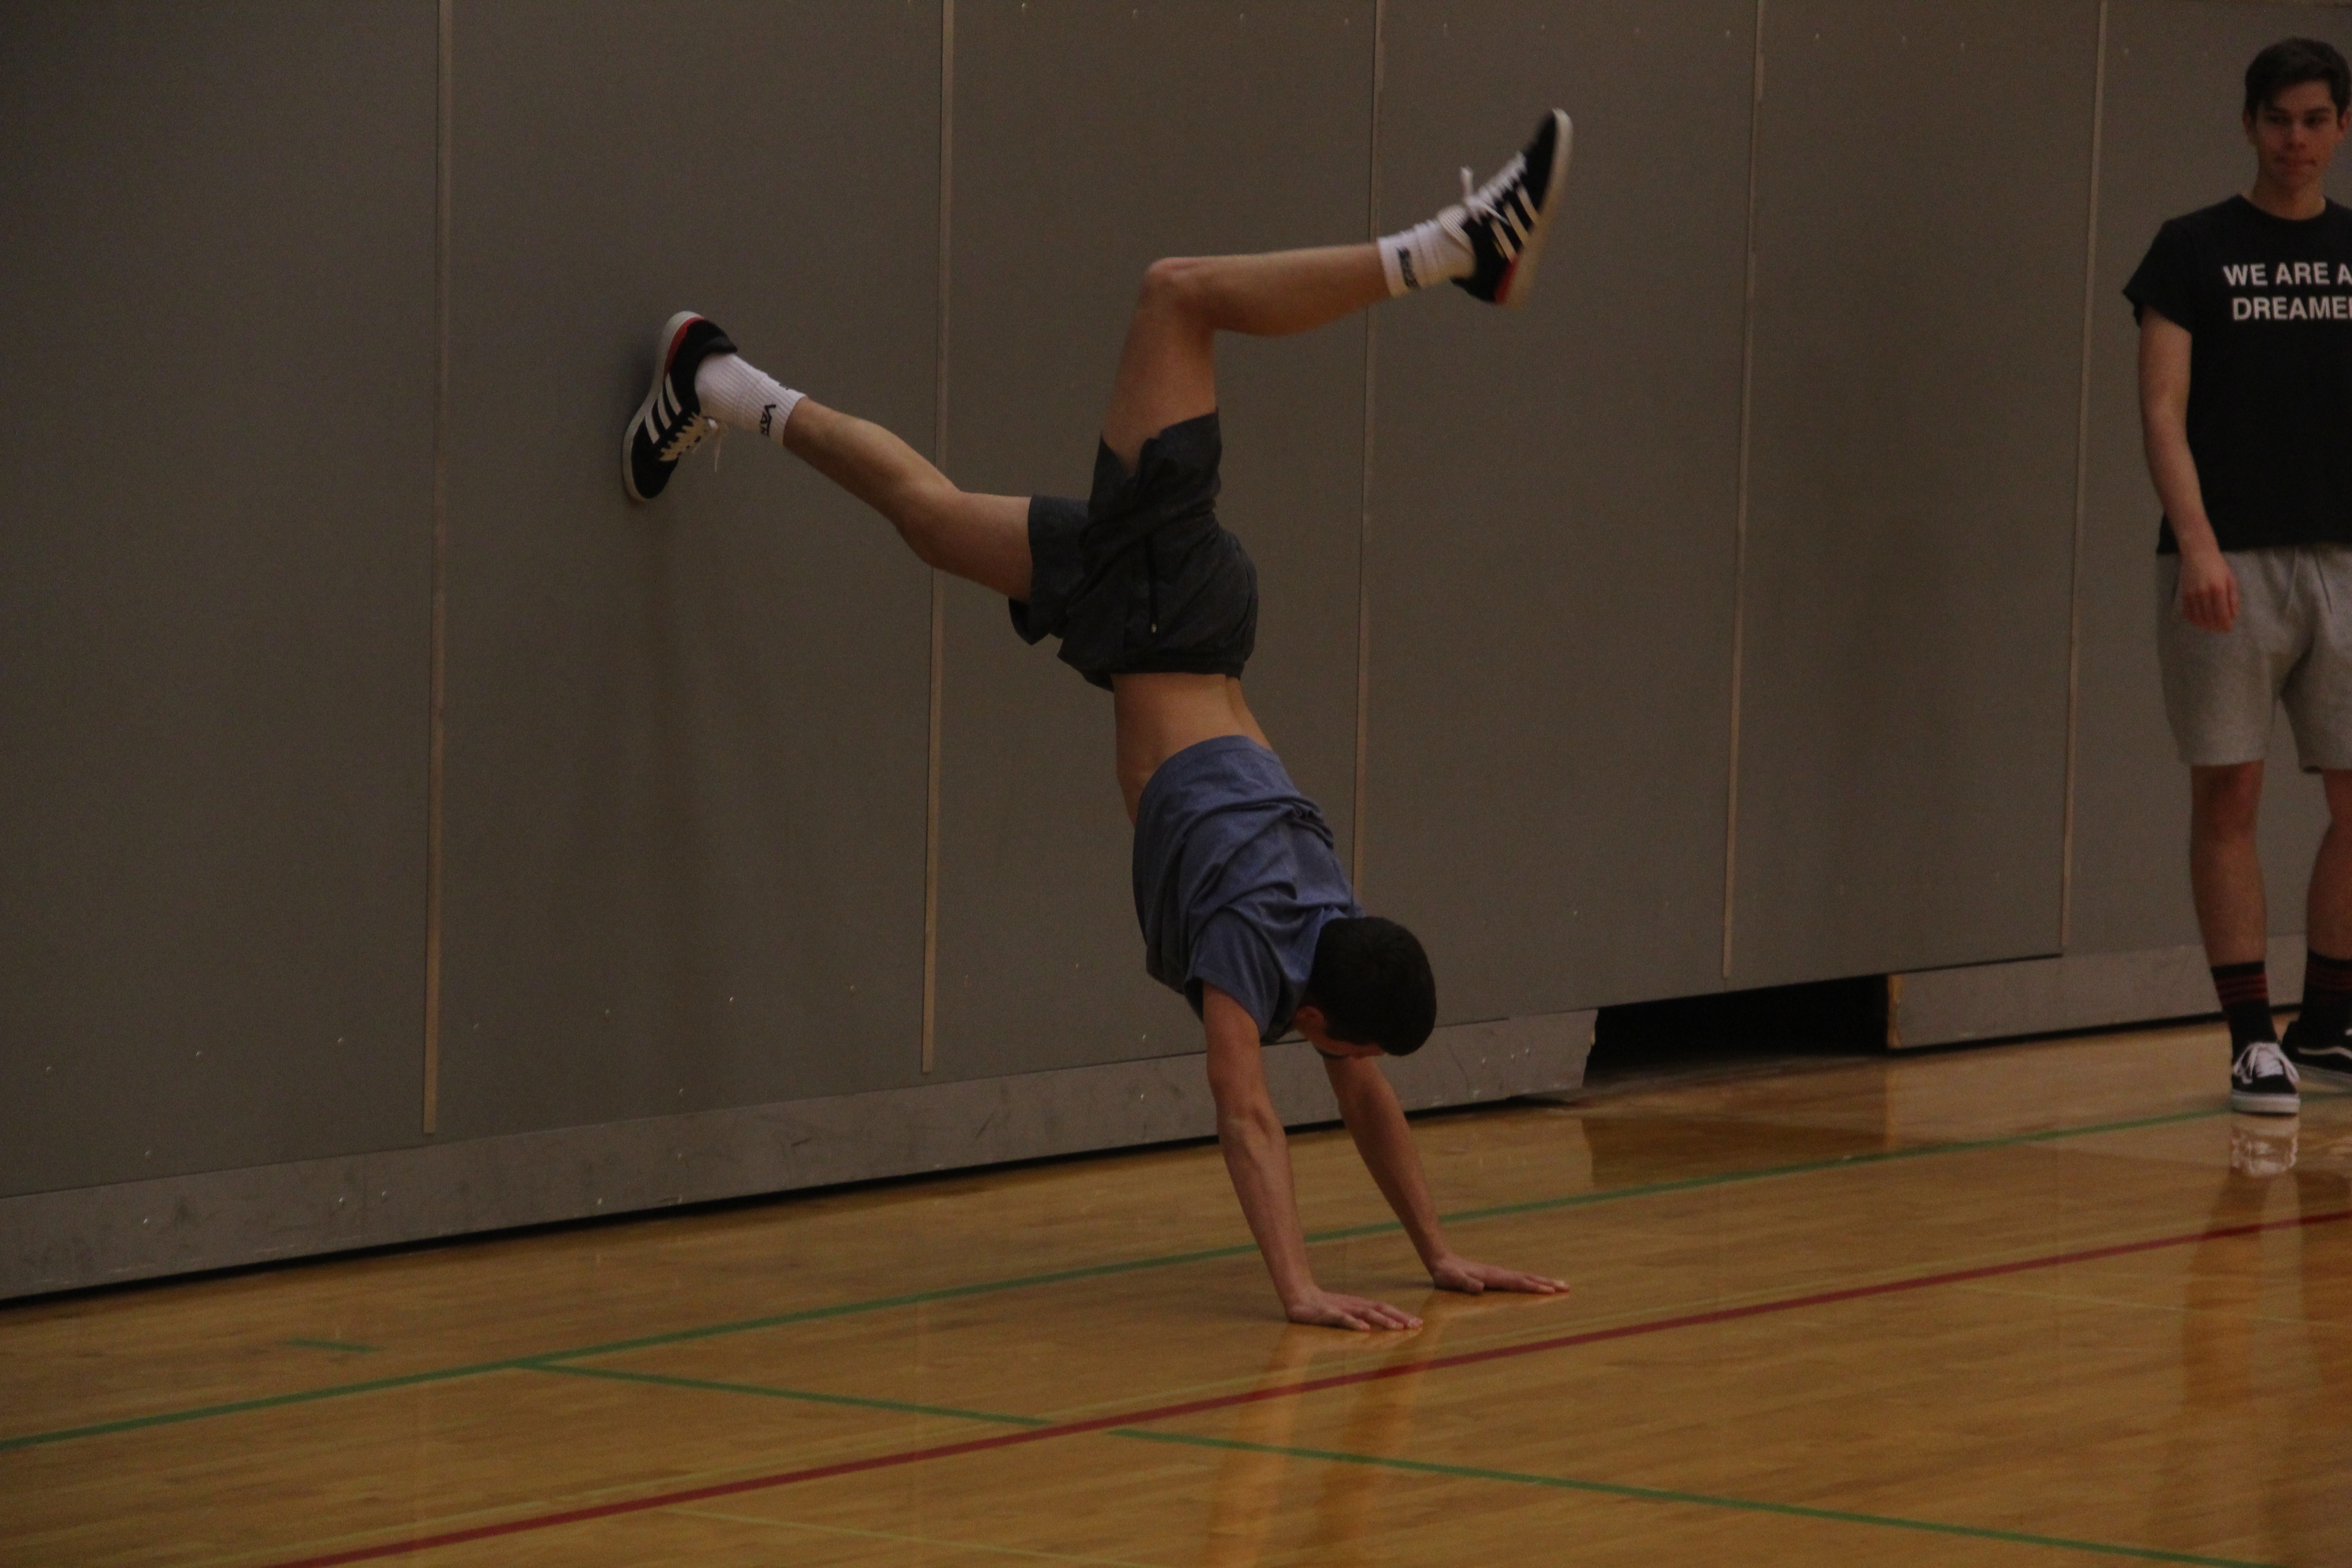
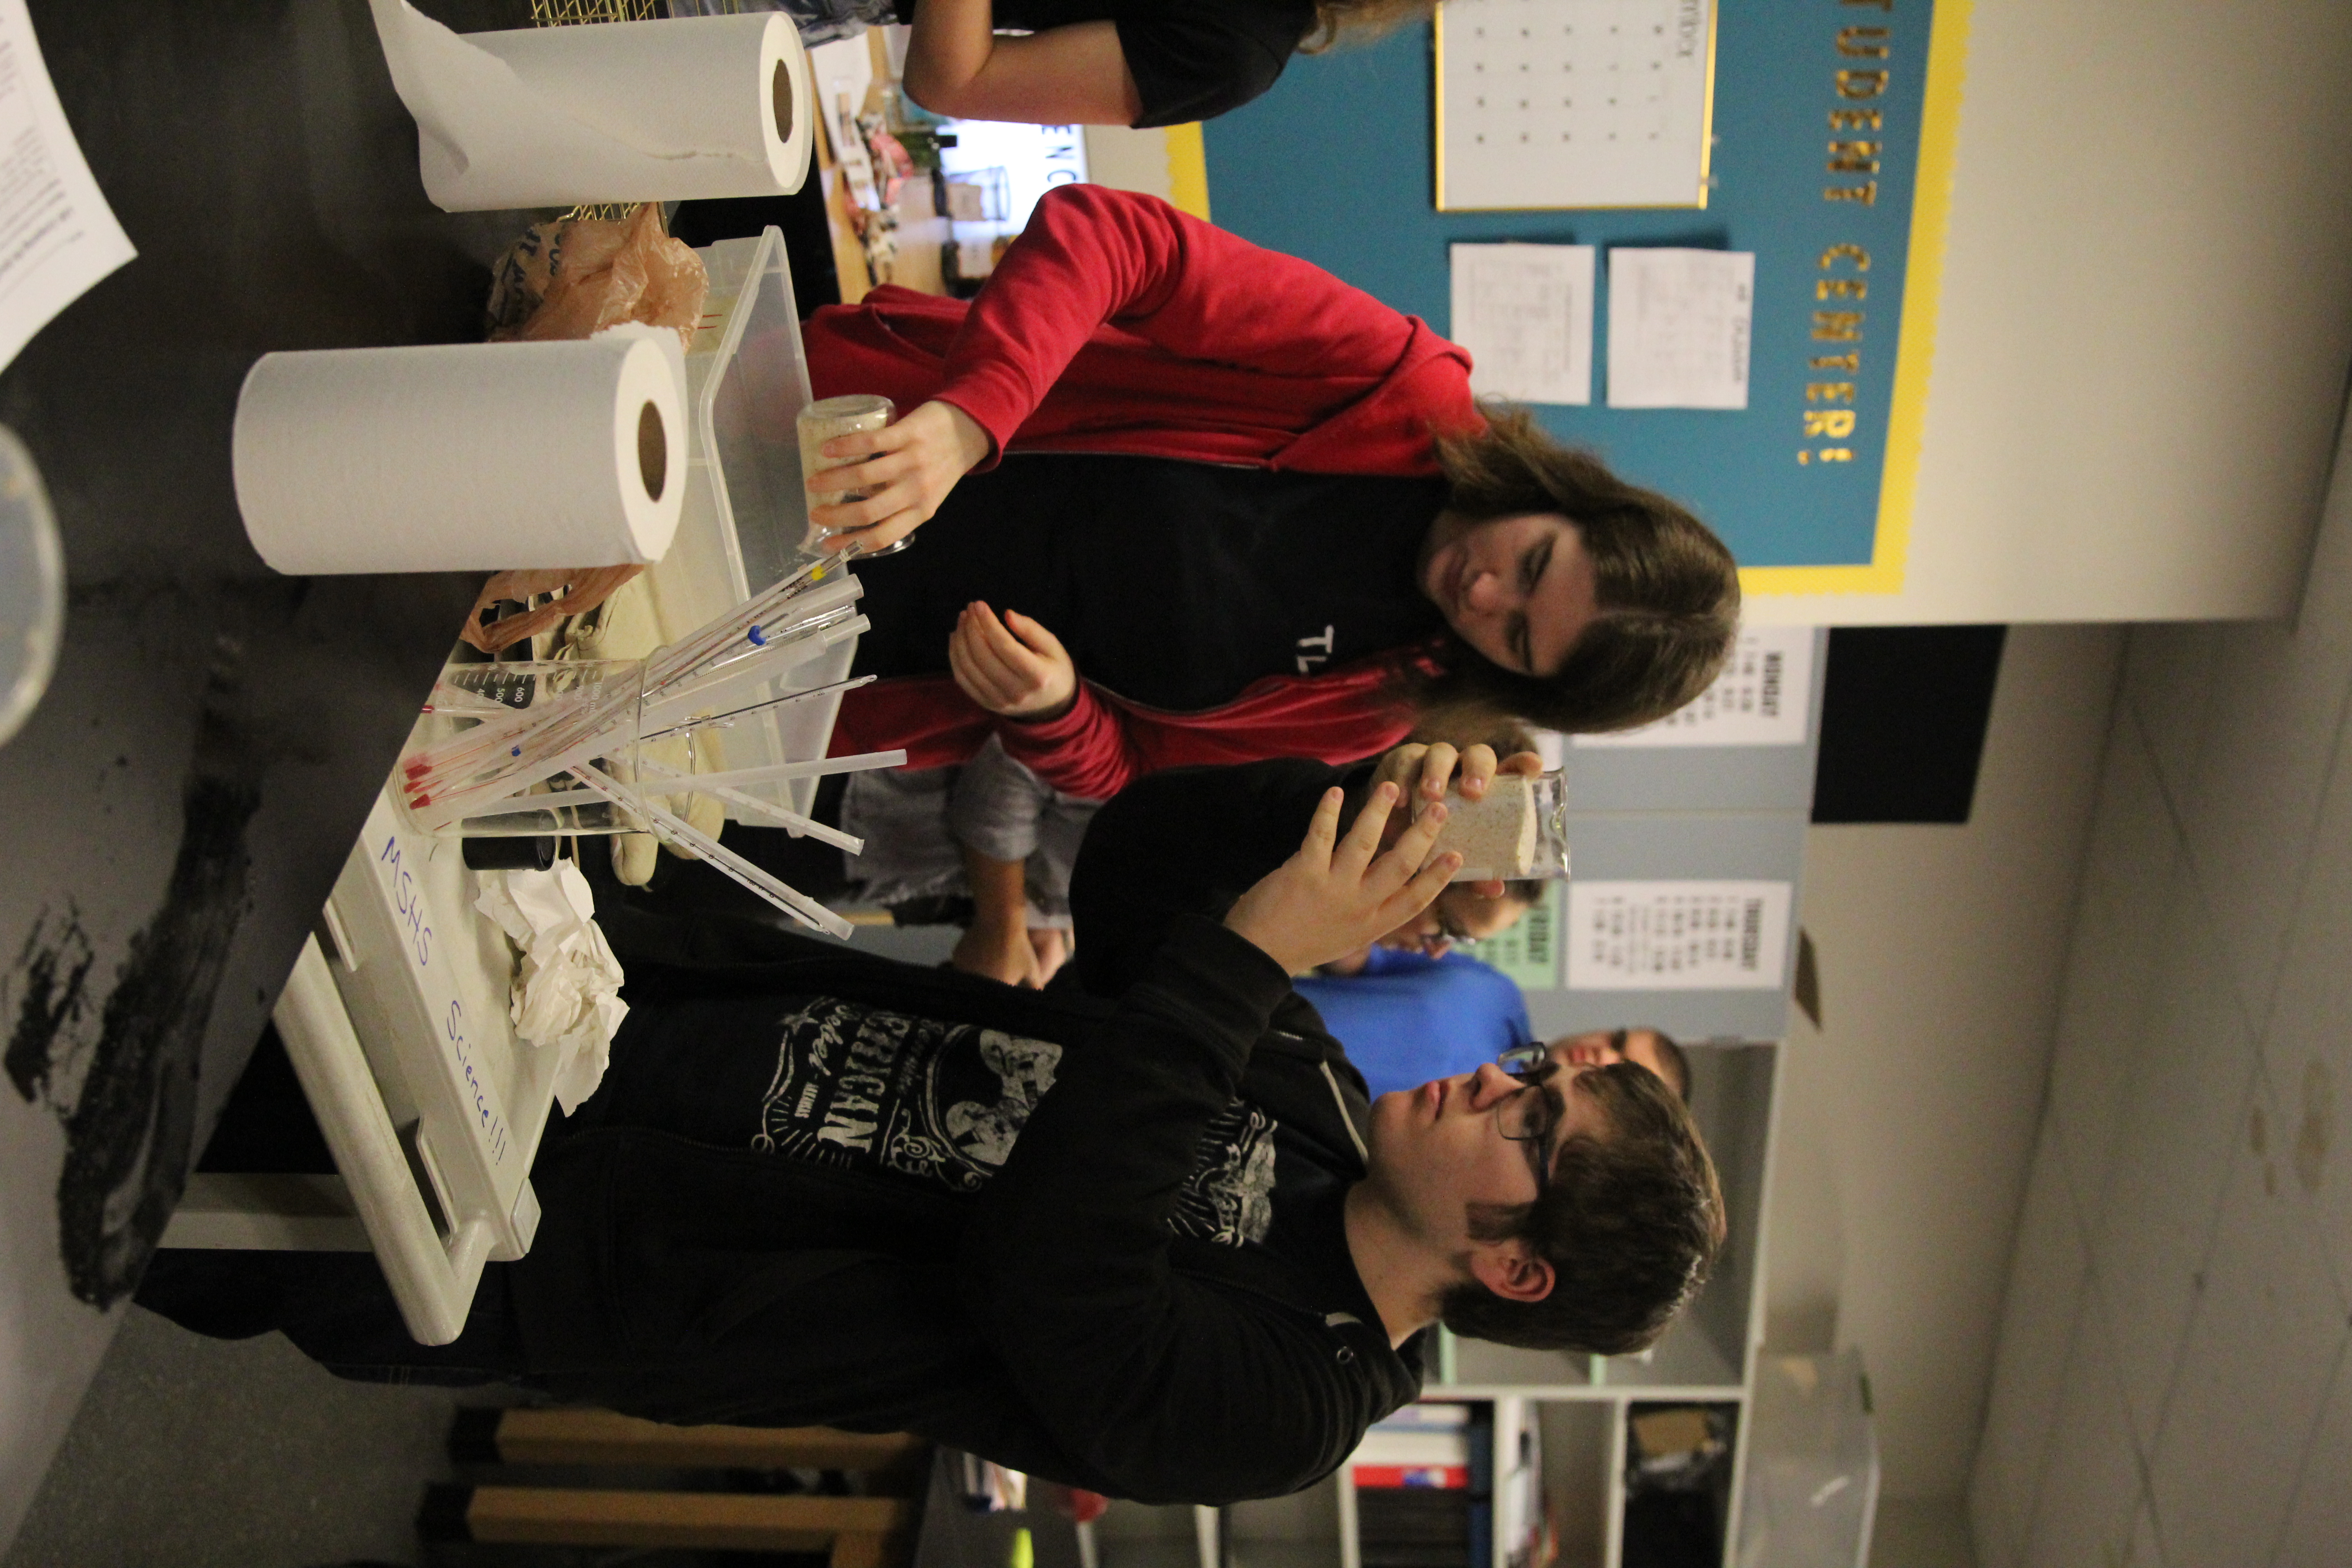
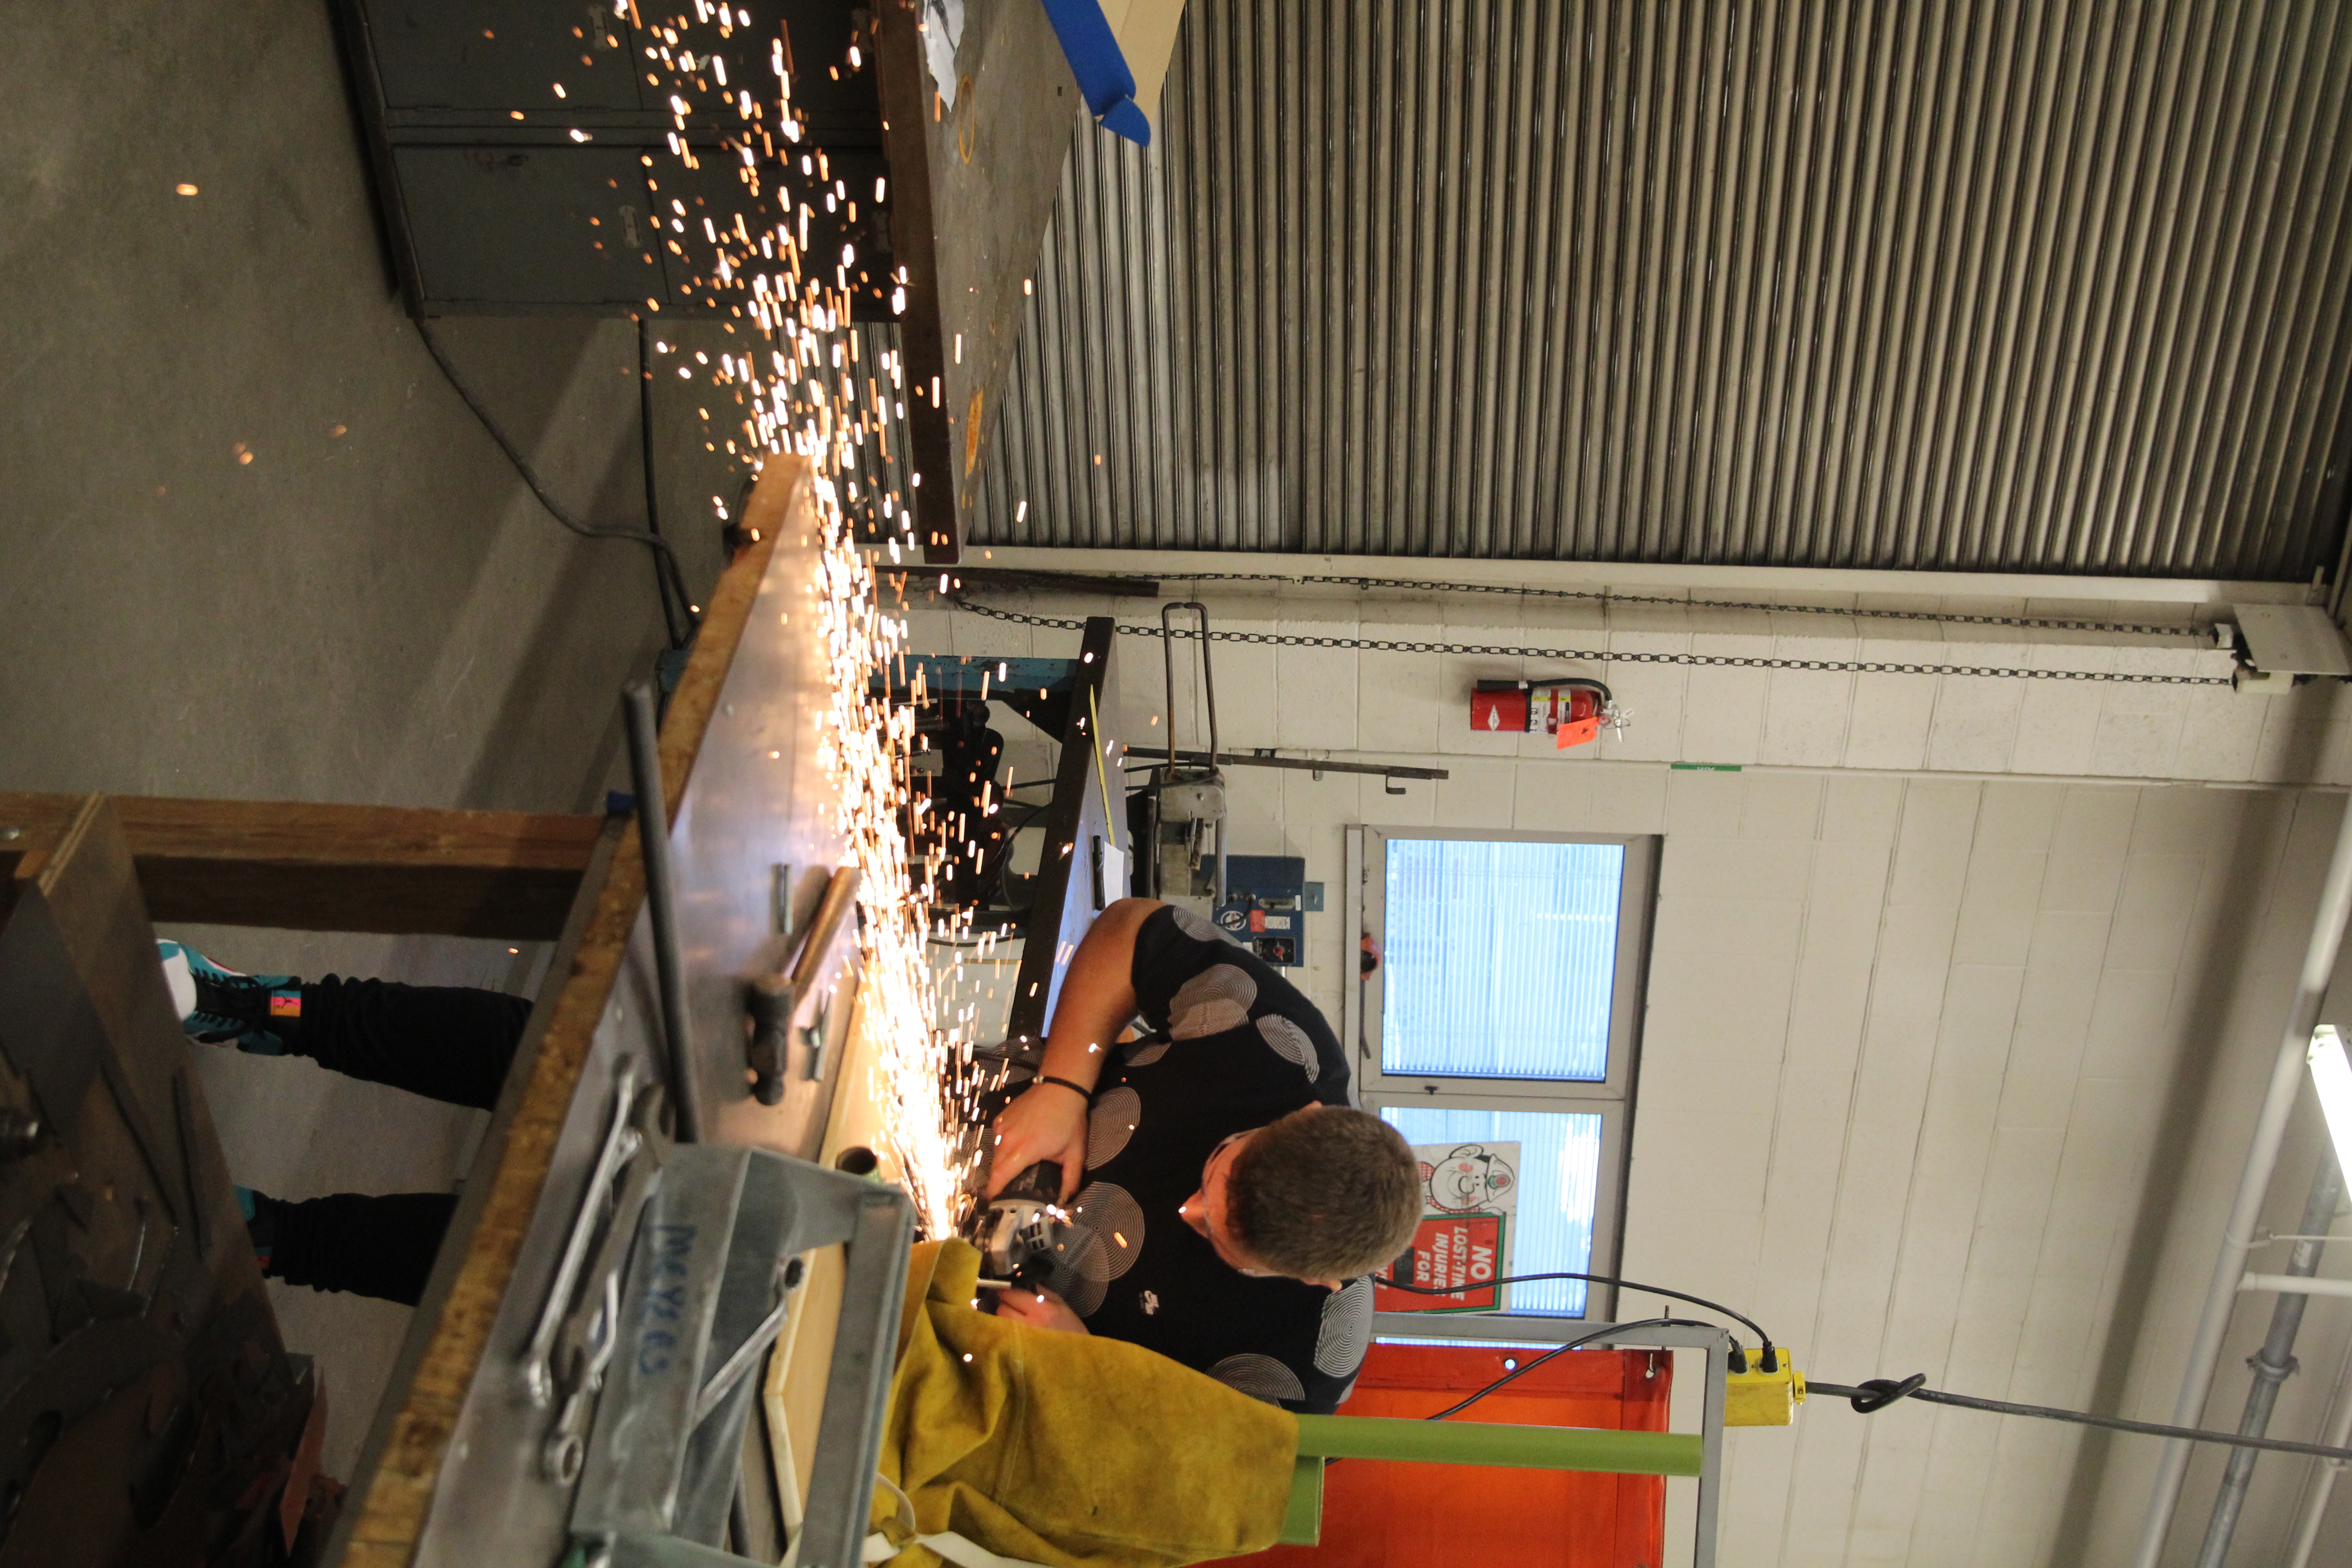
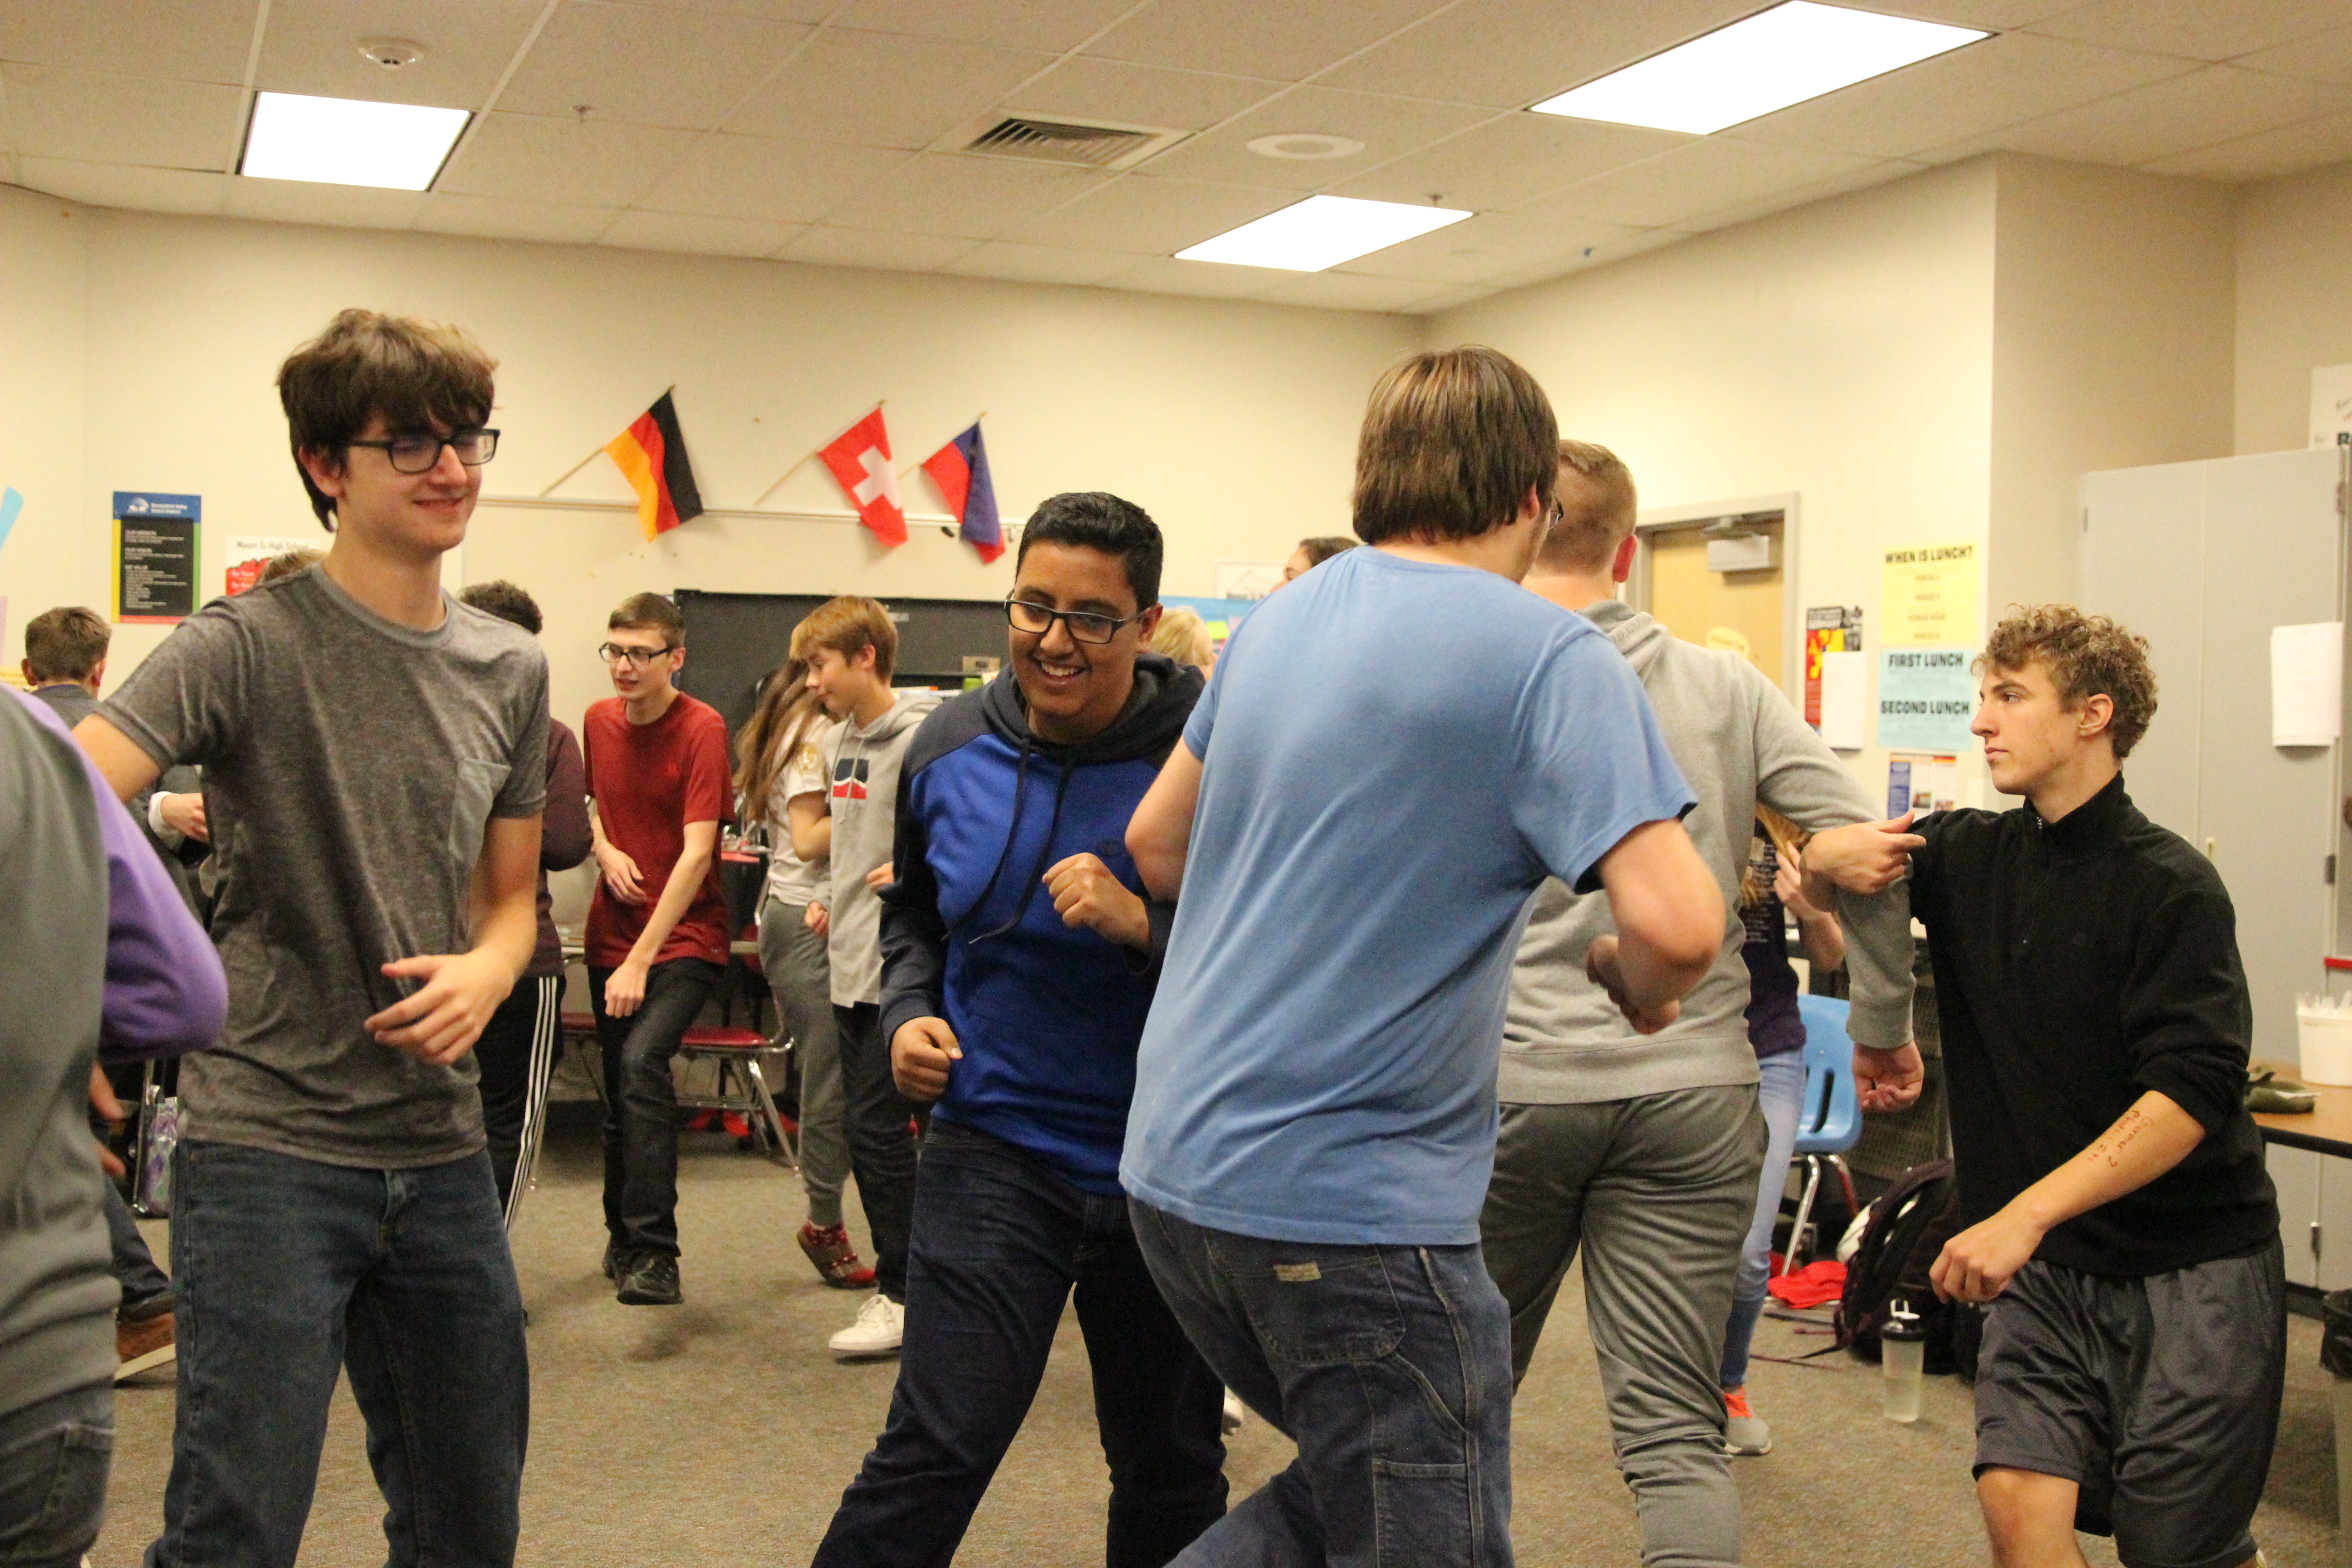